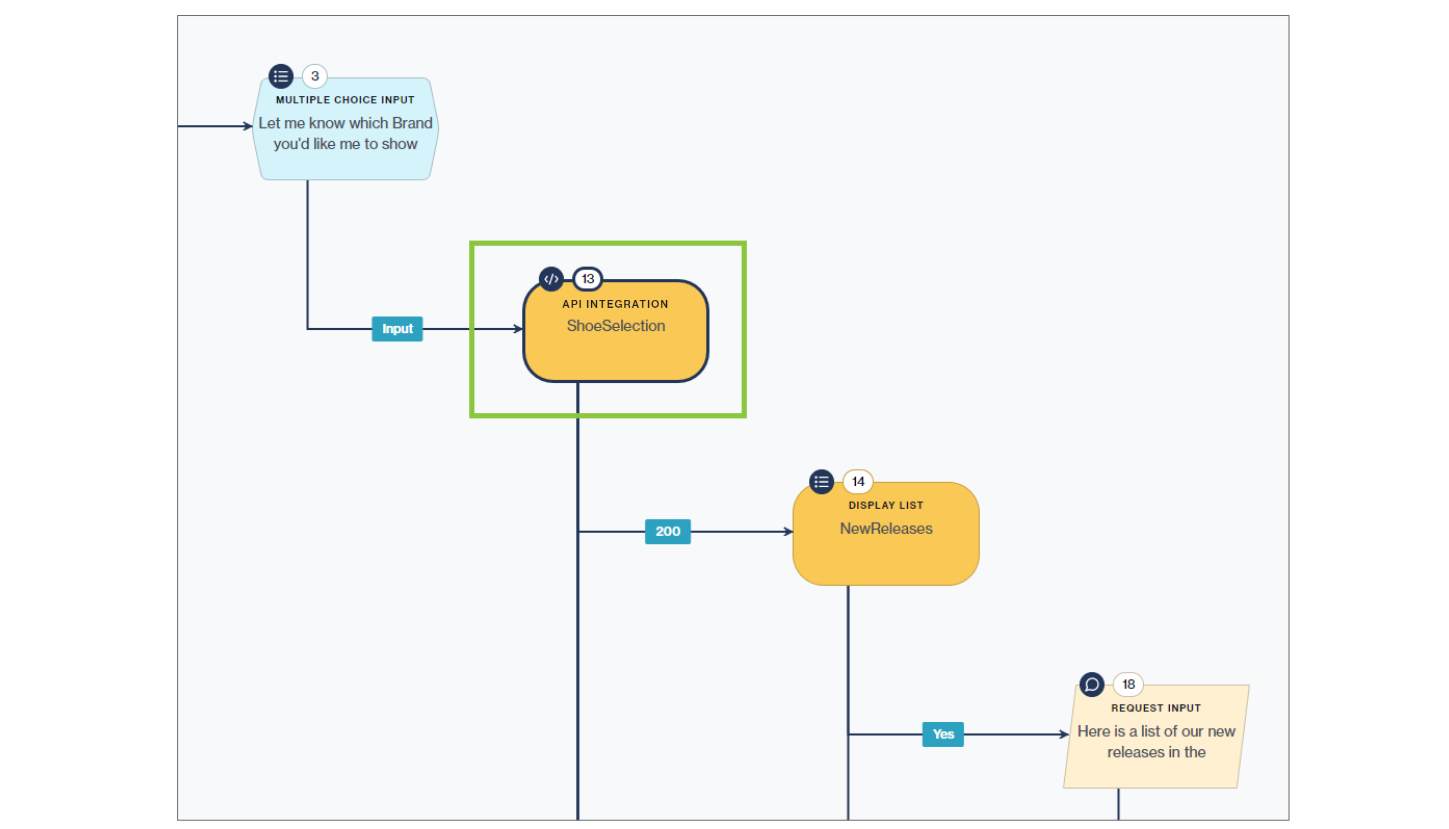
API Integration node
The API Integration action node allows you to call an external API using HTTP.
The API can be from a 3rd-party organization or from within your own organization.
Endpoints must be set up before you can use the API Integration action node to connect to an API from within a workflow.
Refer to the API Integration section for more information on how to do this.
An API Integration node can be used to invoke an HTTP GET or POST, with headers, query parameters, and (in the case of POST) a request body.
Adding a header, query parameter, or request body
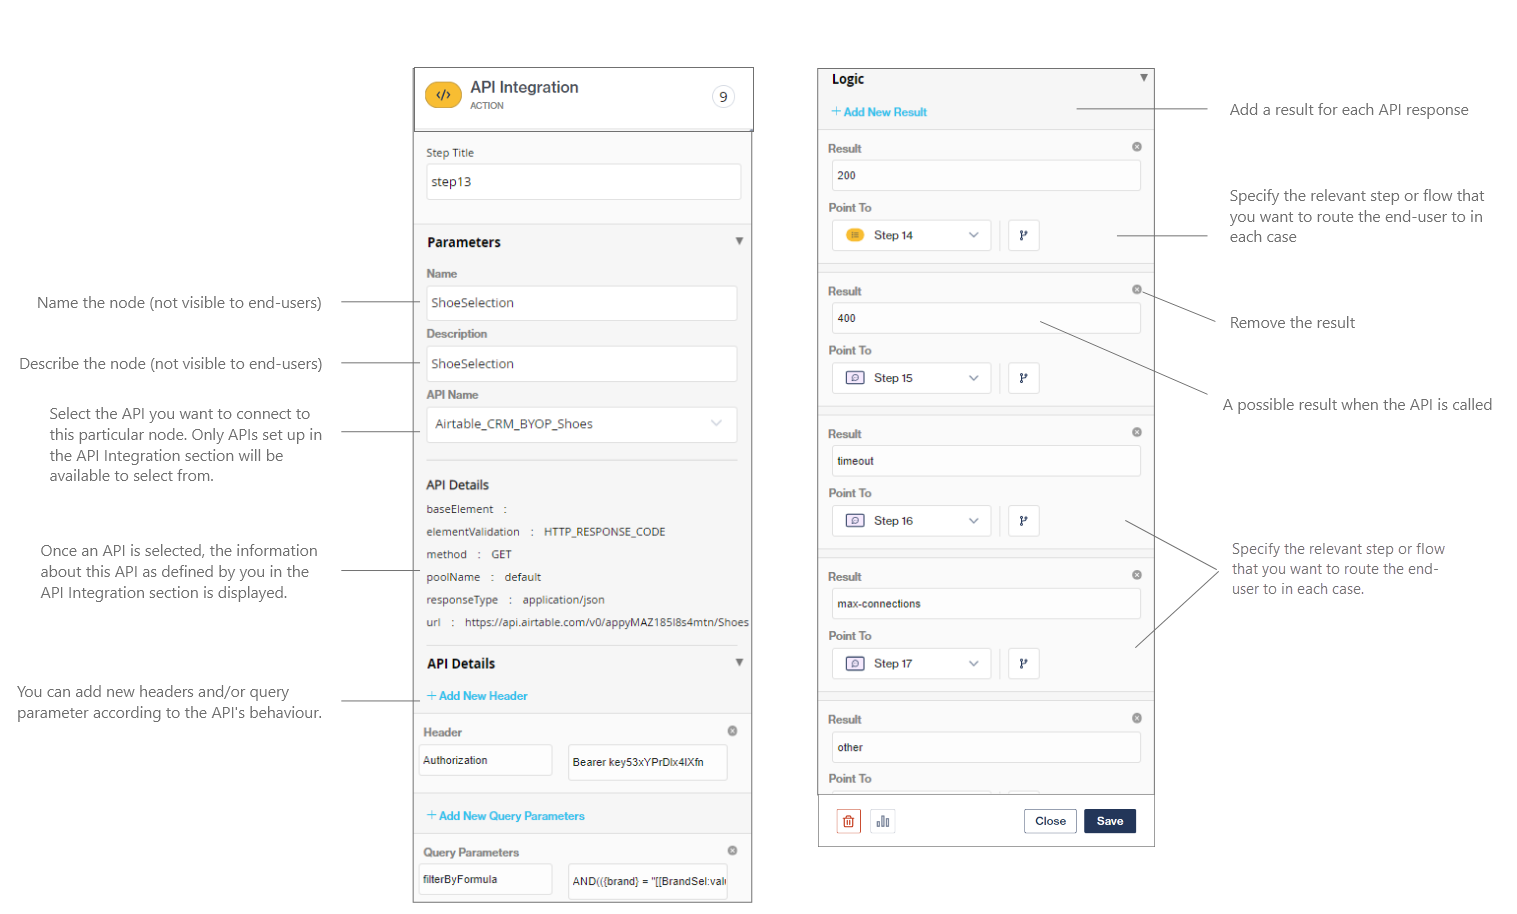
You can add new headers and add new query parameters according to the API's behavior.
Header
Header parameters are included in the request header. This is a combination of a key and value pair. Usually, the header just includes authorization parameters that are common across endpoints.
Note: headers can also be (optionally) specified in the API Integration section. If headers are added in the API Integration nodes as well as in the API Integrations section, ensure that they are the same otherwise your calls will fail.
Adding headers on the API Integrations screen allows the flow-builder to configure the API keys only once on the API level, instead of updating them on each API Integration node, which is especially time-saving when testing.
Query parameters
The query parameters are sometimes referred to as optional parameters and are separated from the hierarchical parameters by the question mark. These parameters are non-unique, i.e. you can specify any one parameter multiple times.
The exact syntax of the actual parameters is not generically defined, but is normally a sequence of key-value pairs (separated by an equal sign), with the sequence separated by either a semicolon or an ampersand.
Body
Frequently, with POST requests (where you’re creating something), you submit a JSON object in the request body. This JSON object may be a lengthy list of key-value pairs with multiple levels of nesting.
For example, the endpoint may be something simple, such as /product/{productId}. But in the body of the request, you might include a JSON object with many key-value pairs.
Adding a new result
You can add a new result for each possible API response that may be returned. Specify the relevant step or flow that you want to route the end-user to in each case.
200 – The request was successfully completed
400 – Bad request
401 – Unauthorized
404 – Not found
503 – Service unavailable
Note: In addition to the default responses (see below), you need to add at least the successful result (200). Other results can be added if required by the API.
Responses
After adding an API Integration node there will be four default responses that need to be mapped with response messages:
other - Catch all non-specified response codes or HTTP response codes
error - Catch catastrophic errors
timeout - Catch API is not responding within time frame
max-connection - Catch max pool connections
Note: All responses mentioned above have to be written with lower case letters, else you will receive an error. Do not remove these default responses.