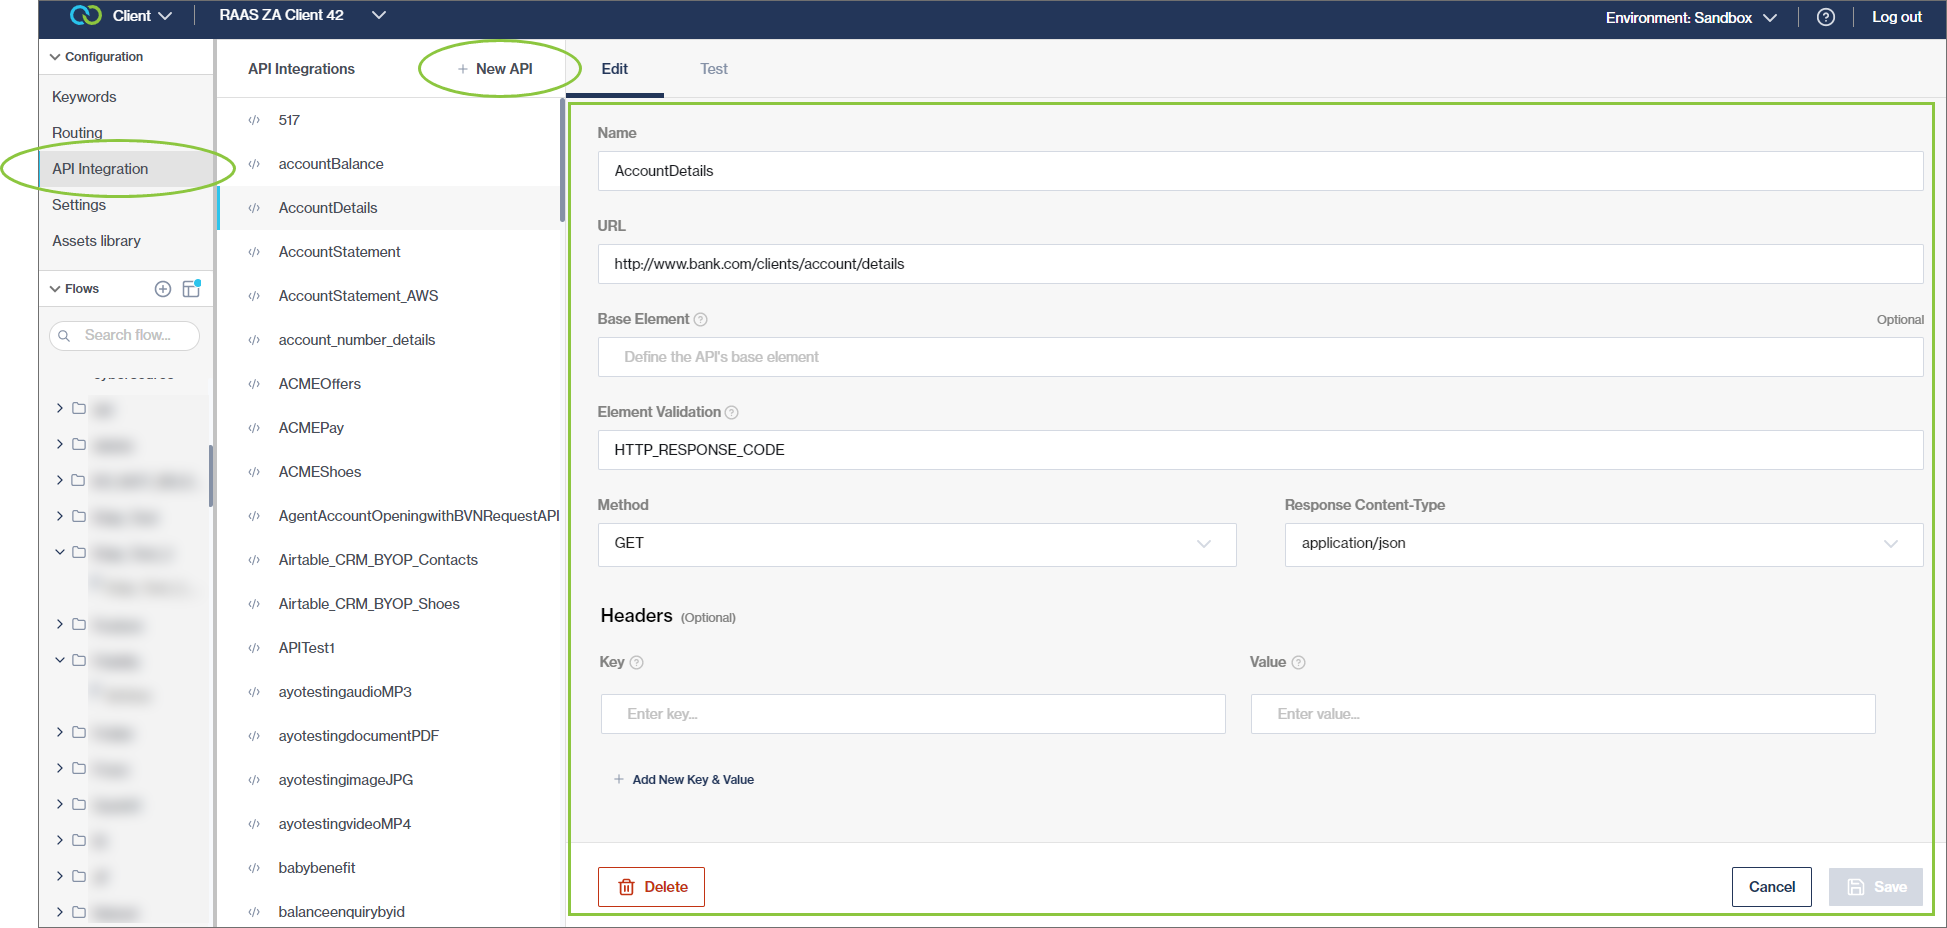
Add an API integration
To use APIs in Chat Flow, you first have to add them to the API Configuration section. Once you've added an API endpoint in the integration section, it can be used across multiple flows.
API endpoints must be set up before you are able to use the API Integration action node to connect to an API from within a workflow.
Adding an API integration
Under Configuration on the left, select API Integration.
Click +New API at the top.
Complete the required information in the panel on the right.
Click Save.
Name
This is the name of the endpoint.
URL
Enter the URL, e.g., "http://clickatell.com/endpoint".
Base element (optional)
If you are using the Display List node in your workflow and want to use a variable from the list somewhere else in your flow (e.g., display it to the customer), you have to define the API's base element. The base element is a breakdown of the variables that you want to retrieve from a list.
For example, let's say you receive a user ID when a customer registers. In order to use this user ID further down the line in your workflow, you need to define what that user ID means in your API and where Chat Flow can retrieve that user ID.
The base element needs to be configured using JSONPath. Everything contained in this element will be parsed and available as variables in the flow.
The structure is usually: API name, list name, variables.
Element validation
This field allows Chat Flow to understand and support the error response codes coming from the API. It then allows you to map the response codes of your API in your workflows to allow Chat Flow to push your customers to a certain journey/path within that workflow.
This is a compulsory field and if not defined, Chat Flow will not know what to do with the response returned by the API.
Element validation needs to be configured using JSON Path or HTTP_RESPONSE_CODE. This element/HTTP_RESPONSE_CODE will be used to decide what step to go to next in a flow when using an HTTP Action Node.
HTTP_RESPONSE_CODE is the standard/most basic element validation you have to add.
Method
Select the method. Valid options are:
GET
POST
PUT
DELETE
Request and response content types
Select the request and response content types. Valid options are:
application/json
application/xml
text/json
text/json
Headers
Header parameters are included in the request header. This is a combination of a key and value pair. Usually, the header just includes authorization parameters that are common across endpoints.
Headers can also be specified in the API Integration nodes themselves. If headers are added in the nodes as well as here in API Integrations, ensure that they are the same otherwise your calls will fail.
Adding headers on the API Integrations screen, allows the flow-builder to configure the API keys only once on the API level instead of updating them on each HTTP Call node, especially time-saving when testing.
| Header name | Description | Examples |
|---|---|---|
Accept | Specifies the content types that are valid in the response message. If the server cannot respond with the requested content type, the 406 Not Acceptable HTTP status message is returned. | application/xml application/json |
Content-Type | Indicates the content type that is used in the body of the request. The supported content type is XML. | application/xml |
Authorization | Authorization should contain your unique API key | <type> <credentials> |
Testing your API integration
After you've added your API integration as described above, you can test whether your connection is correctly set up and that you receive the correct response as intended.
To test your API integration:
Select the API integration you want to test from the list in the API Integration section.
Select the Test tab in the panel on the right.
Complete the applicable information in the Query Params and Headers sections.
Click Test.
Look in the Body tab whether your test was successful.