Add new OAuth Client - Zendesk Support
If you’ve already set up an OAuth Client for your integration with Clickatell, follow these steps to find the required integration details.
To integrate with Zendesk Support, you need to copy over the Client ID and Client Secret from Zendesk Support into the Clickatell Portal. These are unique and get generated when you add a new OAuth Client in Zendesk Support.
Create a new Connected App in Zendesk Support
An admin user must log in to your Zendesk Support account.
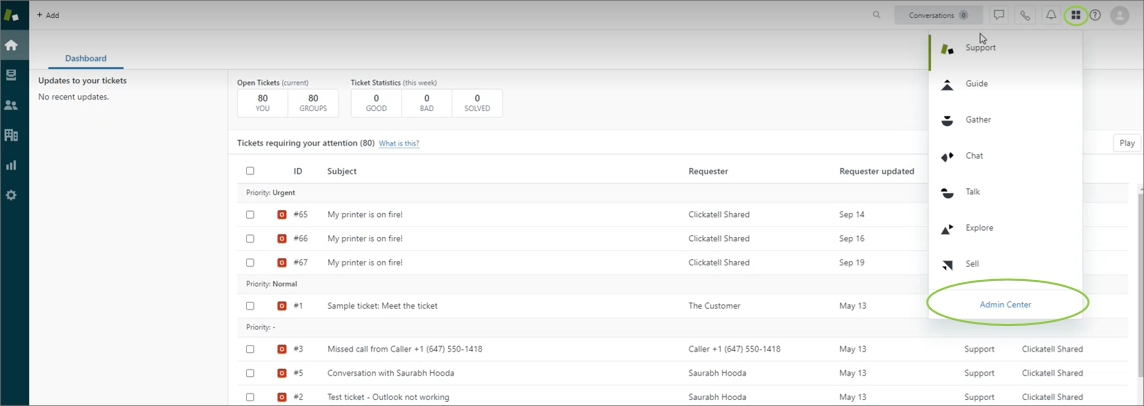
Click on the “Apps” icon in the top right.
Click “Admin Center”.
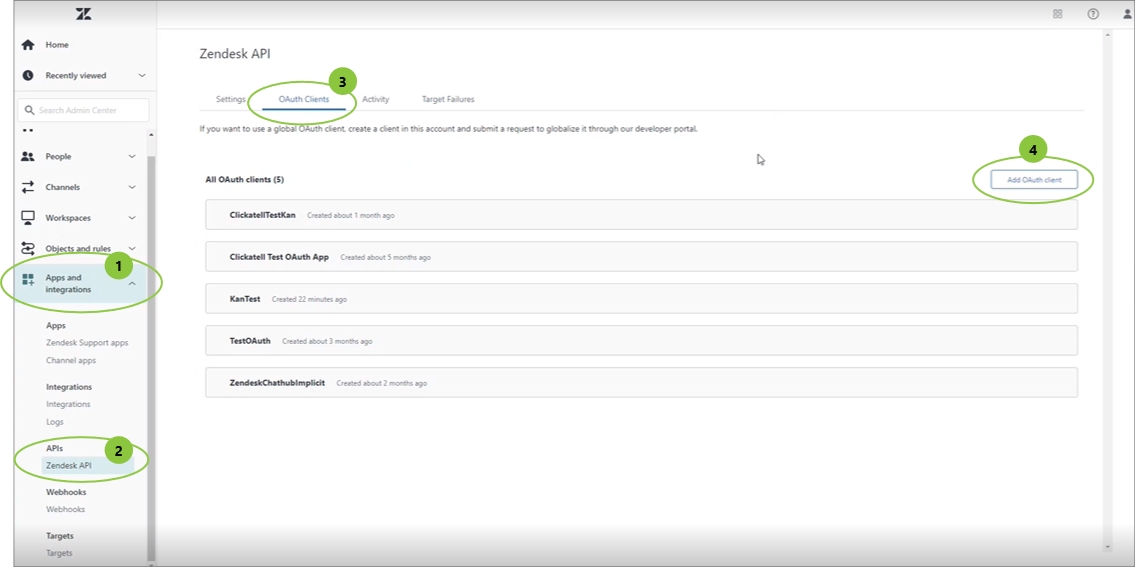
Go to Apps and Integrations -> Zendesk API -> OAuth Clients -> Add OAuth Client.
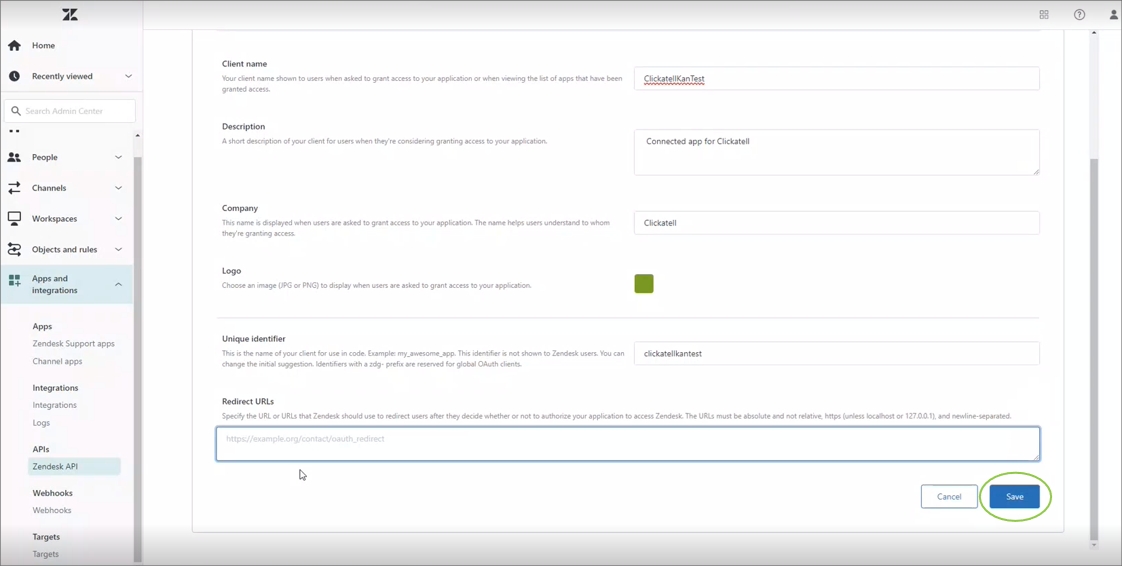
Enter the required fields:
Client name & Description: Add the name and description shown to users.
Company & Logo: Add your company name and logo (optional).
Unique identifier: This can be anything, but it’s recommended to keep it short.
Redirect URL: Use https://authentication-service.clickatell.com/authorize/result
Click Save.
Once saved, you’ll be presented with the configuration details required in the Clickatell Portal.
Last updated