Manage Callback Notifications
Before you can link a 3rd party application to Clickatell's Chat 2 Pay API, you must enable it first.
For more information on the Chat 2 Pay API, see the technical documentation here.
To enable an application:
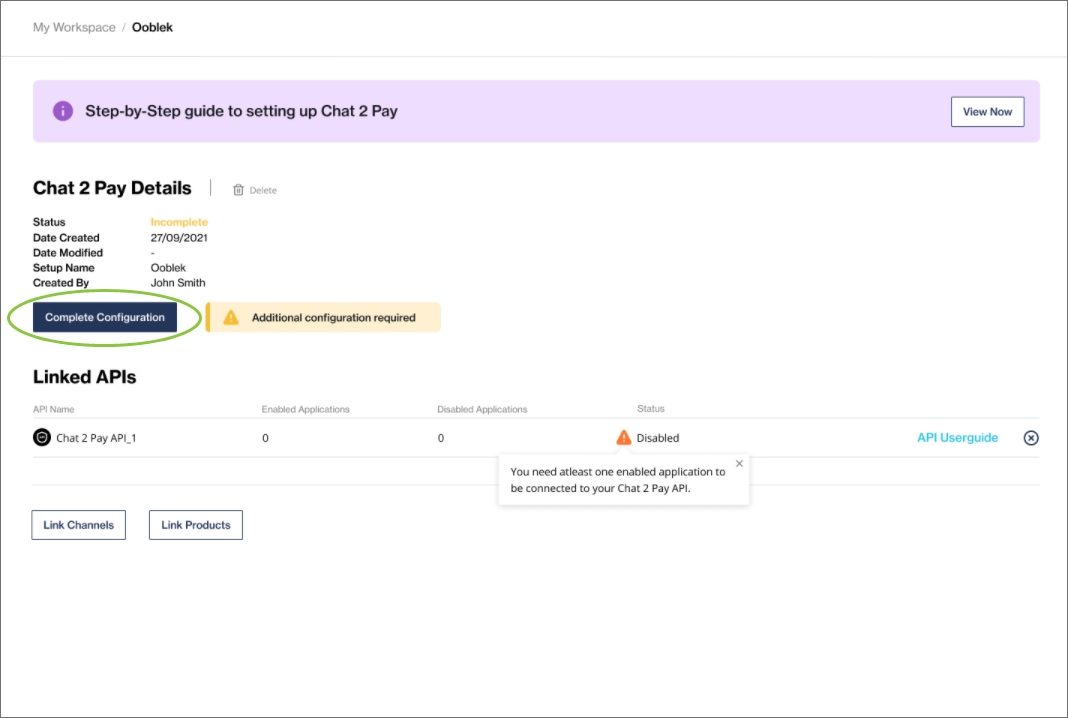
Click Complete Configuration.
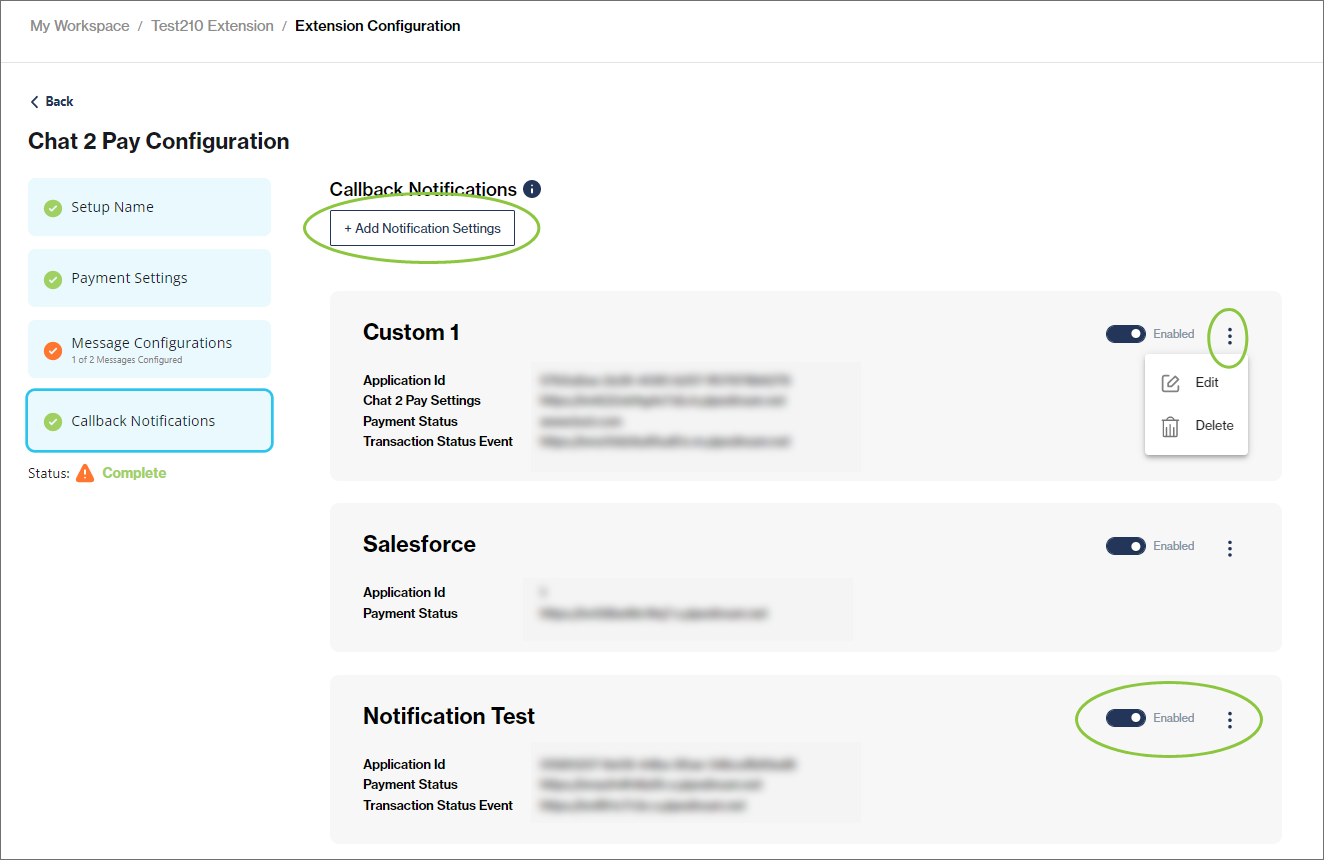
Go to Callback Notifications and click Add Notification Settings.
Select the application type you want to link to Chat 2 Pay and complete the required information (see below).
Ensure the application is toggled to "Enabled".
You can add multiple applications, as well as disable/enable, edit, and delete applications from this screen.
Customer Application
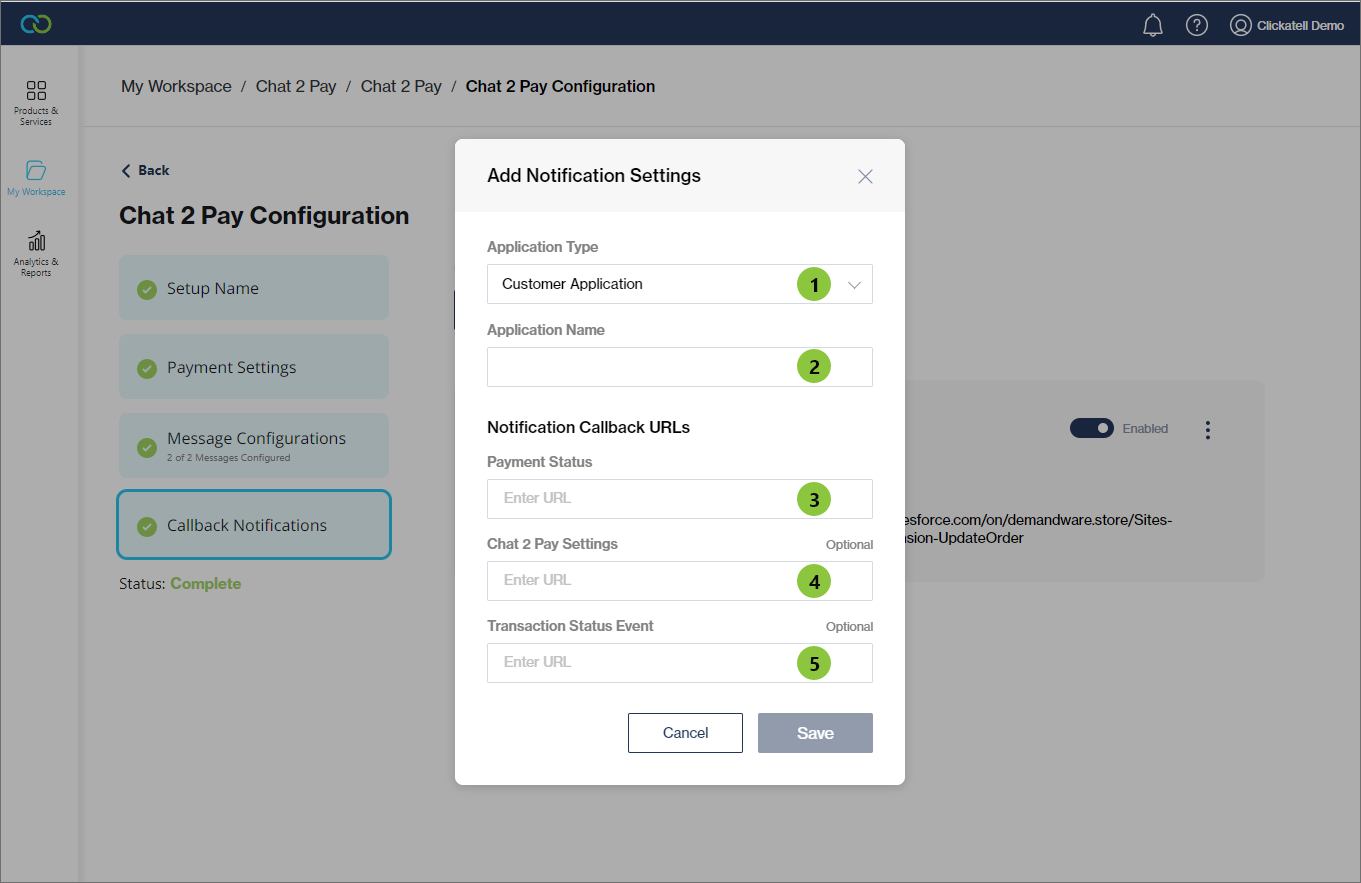
Select "Customer Application" to link a 3rd-party (i.e., non-Clickatell) application to Chat 2 Pay.
Application Name: Enter any name to help identify this linked application
Payment Status: A notification is sent after each payment status change (e.g., payment status received, capture, reversal). Specify the URL for these notifications.
Chat 2 Pay Settings: A notification is sent after a change in the Chat 2 Pay configuration (i.e. when an API key, currency, or channel is added/removed). Specify the URL for these notifications.
Transaction Status Event: A notification is sent after the following transactional events: payment link creation, link cancellation, link clicked, link expiration, and payment status change. Notifications are sent to the integrator that created the payment link (specified by applicationId). Specify the URL for these notifications.
OMS
Currently, Salesforce is the only OMS available. See here for more information on setting up Chat 2 Pay in Salesforce.
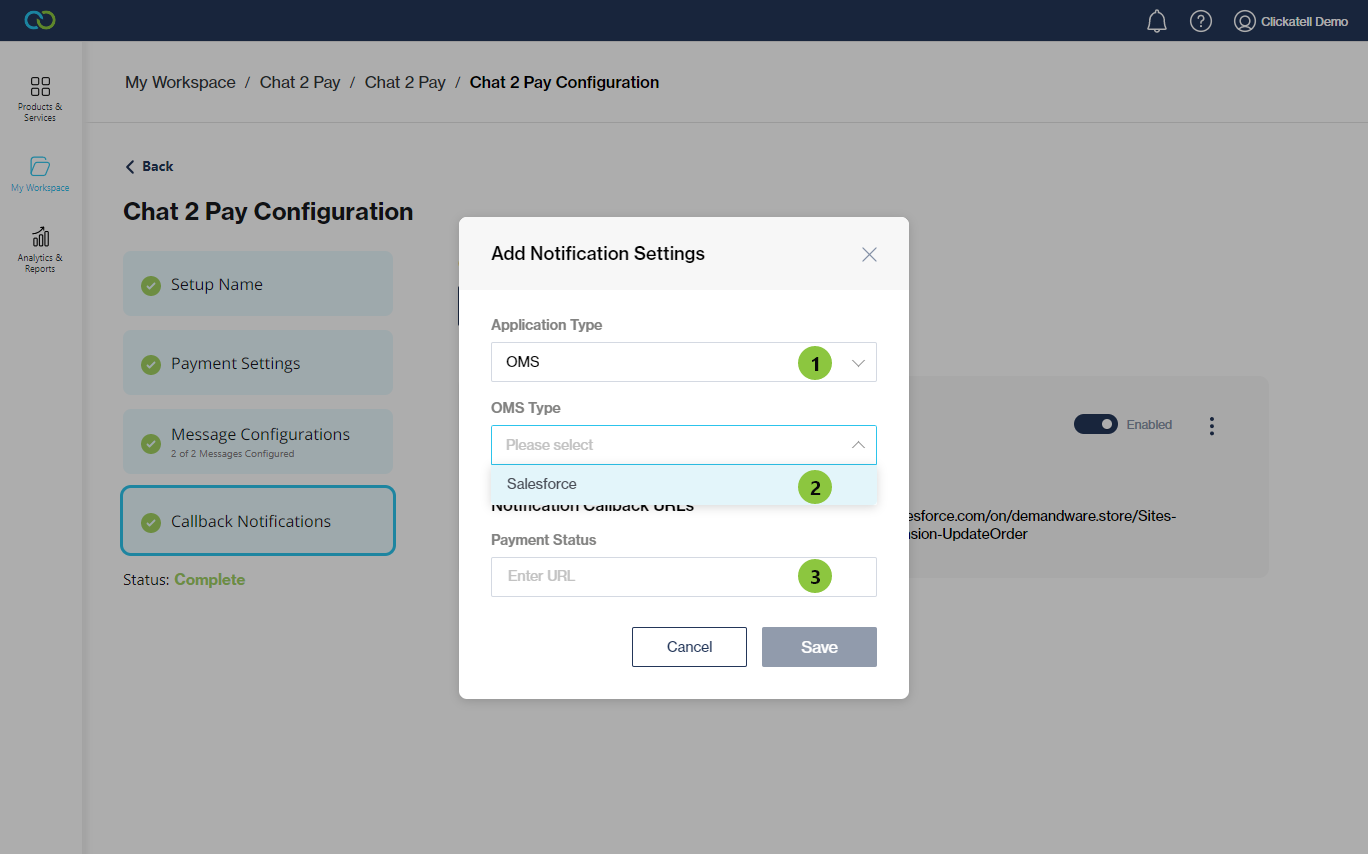
Select "OMS" to link an Order Management System application to Chat 2 Pay.
OMS Type: Select the OMS to link. Currently, only Salesforce is available.
Payment Status: A notification is sent after each payment status change (e.g., payment status received, capture, reversal). Specify the URL for the notifications.