Clickatell
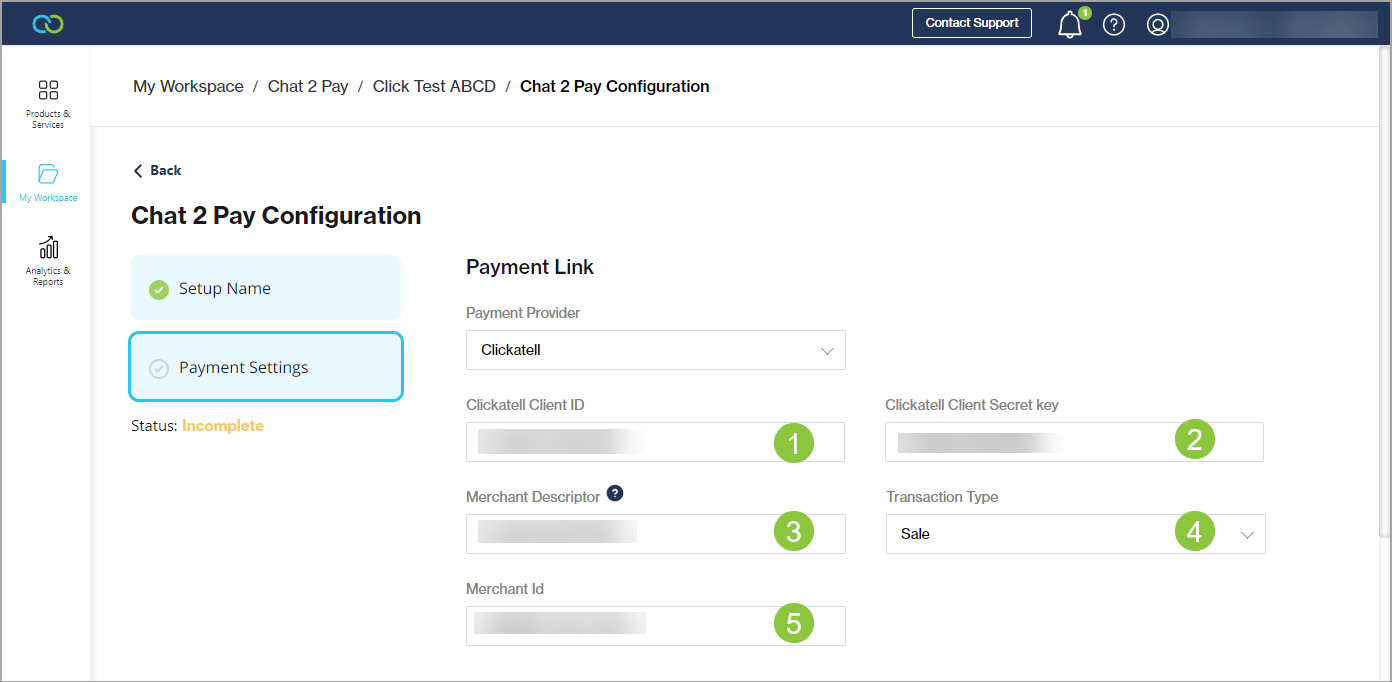
Configure Clickatell Checkout Payment Link
Clickatell Client ID: Your Client ID within Clickatell's system that is provided to you during onboarding.
Clickatell Client Secret Key: Your Client Secret Key within Clickatell's system that is provided to you during onboarding.
Merchant Descriptor: This is the name that appears on both the merchant's and the customer's bank or credit card statements when the customer makes a purchase from the merchant.
Transaction Type:
Authorization: If all transactions using the Chat 2 Pay platform must only result in a credit/debit card authorization. This is used in scenarios where you would like to place a hold on the customer's card with the capture occurring at a later time.
Sale: If all transactions using the Chat 2 Pay platform must result in a credit/debit card authorization and payment acceptance being processed immediately after each other.
Merchant ID: The Merchant ID (MID) configured on your payment provider account that you use to accept payments using the Chat 2 Pay service.
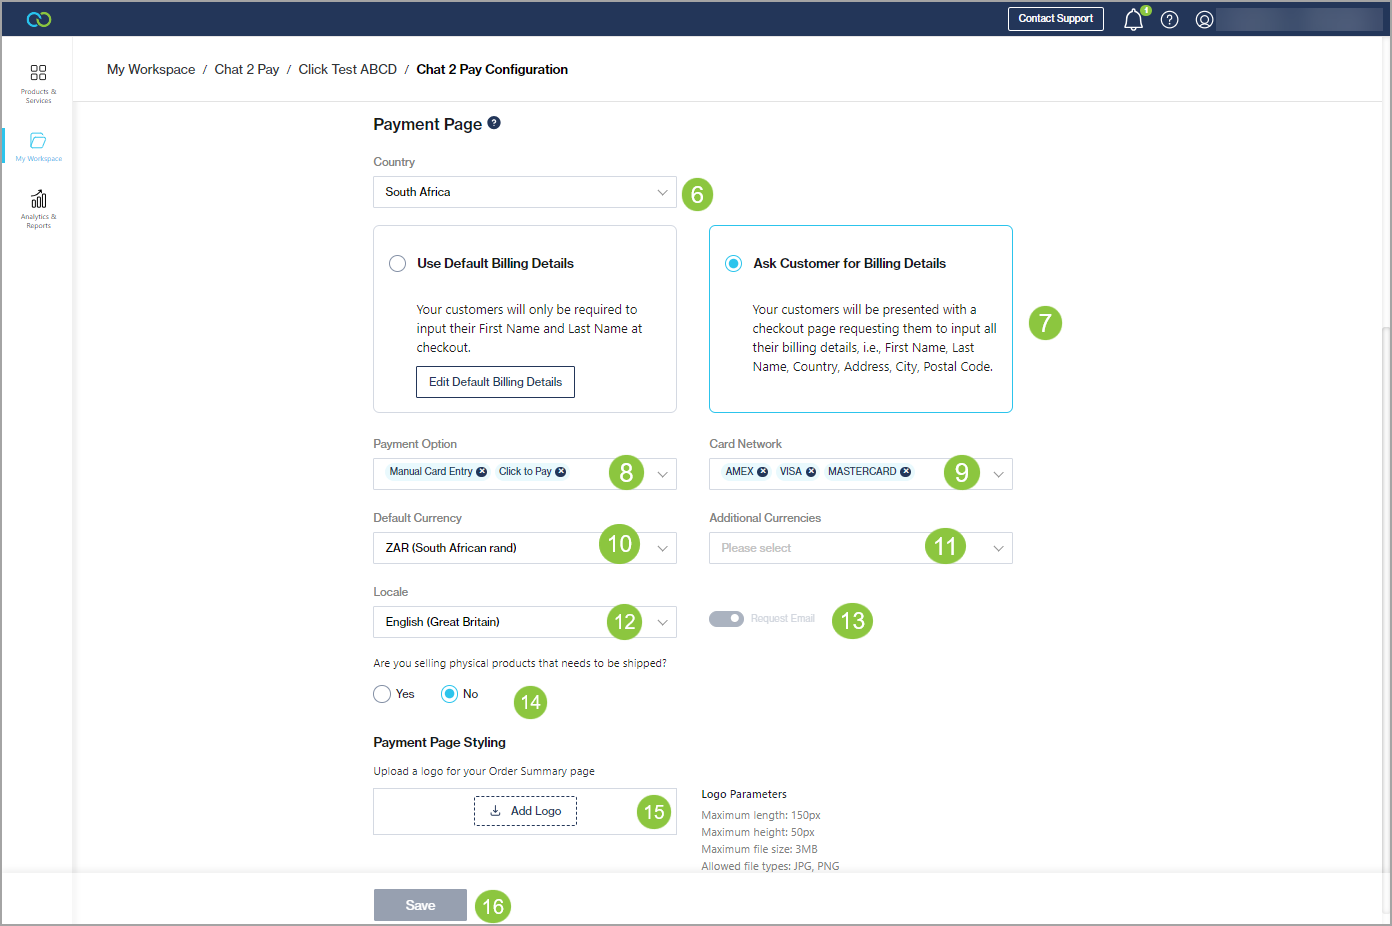
Configure Clickatell Checkout Payment Page
The Payment Page is where your customer adds a new credit/debit card or selects one from a wallet. You can configure what is presented to your customers as explained below.
Country: Select the countries where credit/debit card processing is allowed.
Billing Details: Select to use the default billing details or ask the customer to enter their billing details.
Payment Option:
Manual Card Entry: If you want to allow customers to add a new card.
Click to Pay: If you want to allow customers to save cards and retrieve cards from their wallets – Visa Click to Pay and MasterCard Click to Pay.
Card Network: Select the types of card networks you would like to enable.
Default Currency: Select the currencies that the payment page must support.
Additional Currencies: Select additional currencies that the payment page must support.
Locale: Select the language your payment page must appear in.
Request Email: Enable the payment page to ask for an email address.
Are you selling physical products that need to be shipped: Select Yes or No, depending on whether your products require shipping.
If you select Yes, also select which countries to ship to.
Payment Page Styling: Upload a logo to display to your customers on the Order Summary page.
Save your changes.
Last updated