Salesforce
Embed a Chat 2 Pay “extension” into your Salesforce CRM/OMS to allow a call center agent to trigger the payment request.
Install & authenticate Chat 2 Pay cartridge
Getting Started
Navigate to the Salesforce App Store URL that hosts the cartridge: https://www.salesforce.com/products/commerce-cloud/partner-marketplace/partners/chat-2-pay/
Click the “download” button
When prompted, authenticate yourself with your Commerce Cloud account details
The cartridge is downloaded as a zipped folder
Further instructions to complete the cartridge installation can be found in this folder
Once installation is complete, you are now ready to navigate to and use your cartridge in Salesforce
Activate Chat 2 Pay Cartridge
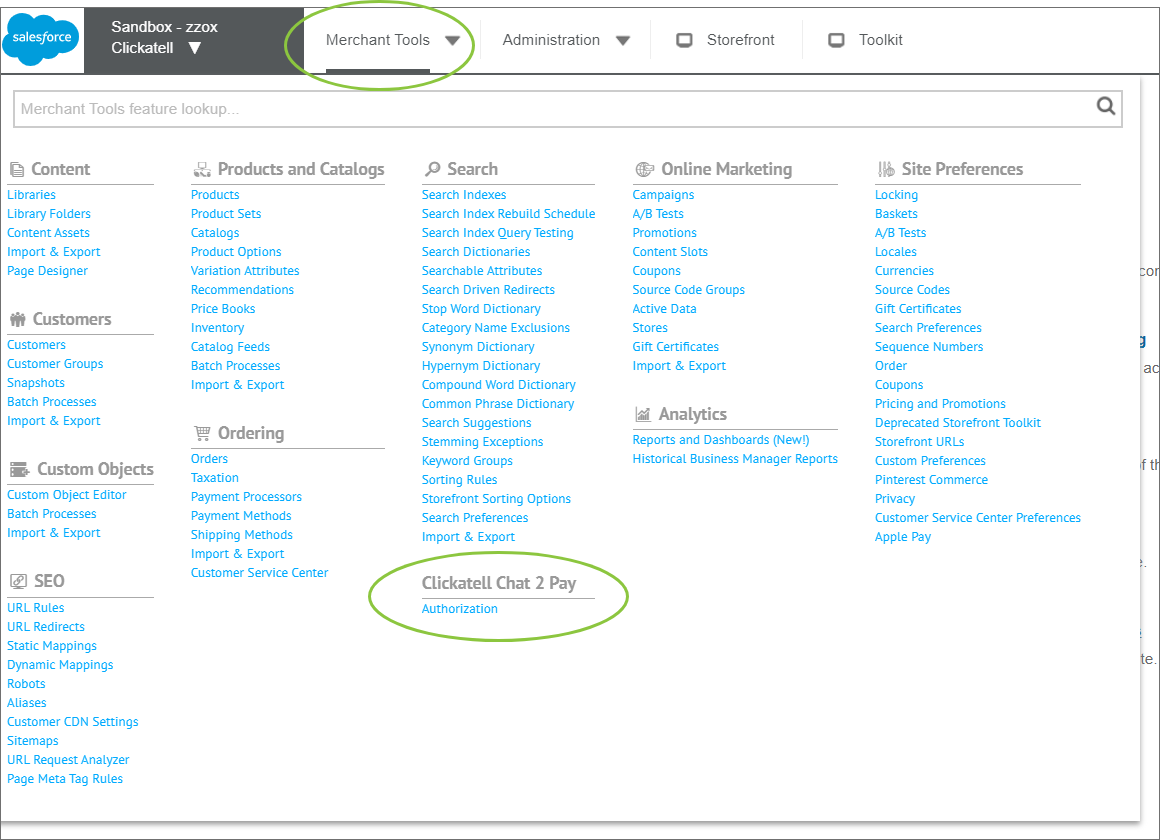
Log into your Salesforce Business Manager account. The Chat 2 Pay extension that you installed appears under Merchant Tools.
Select Authorization and enter the activation key generated when you configured the extension in the Clickatell Portal when prompted. Click Submit.
Once activated, Chat 2 Pay is ready for use by your customer service agents.
Using Chat 2 Pay as a Customer Service Agent
The agent logs in to the Salesforce Customers Service Center and clicks Create New Order.
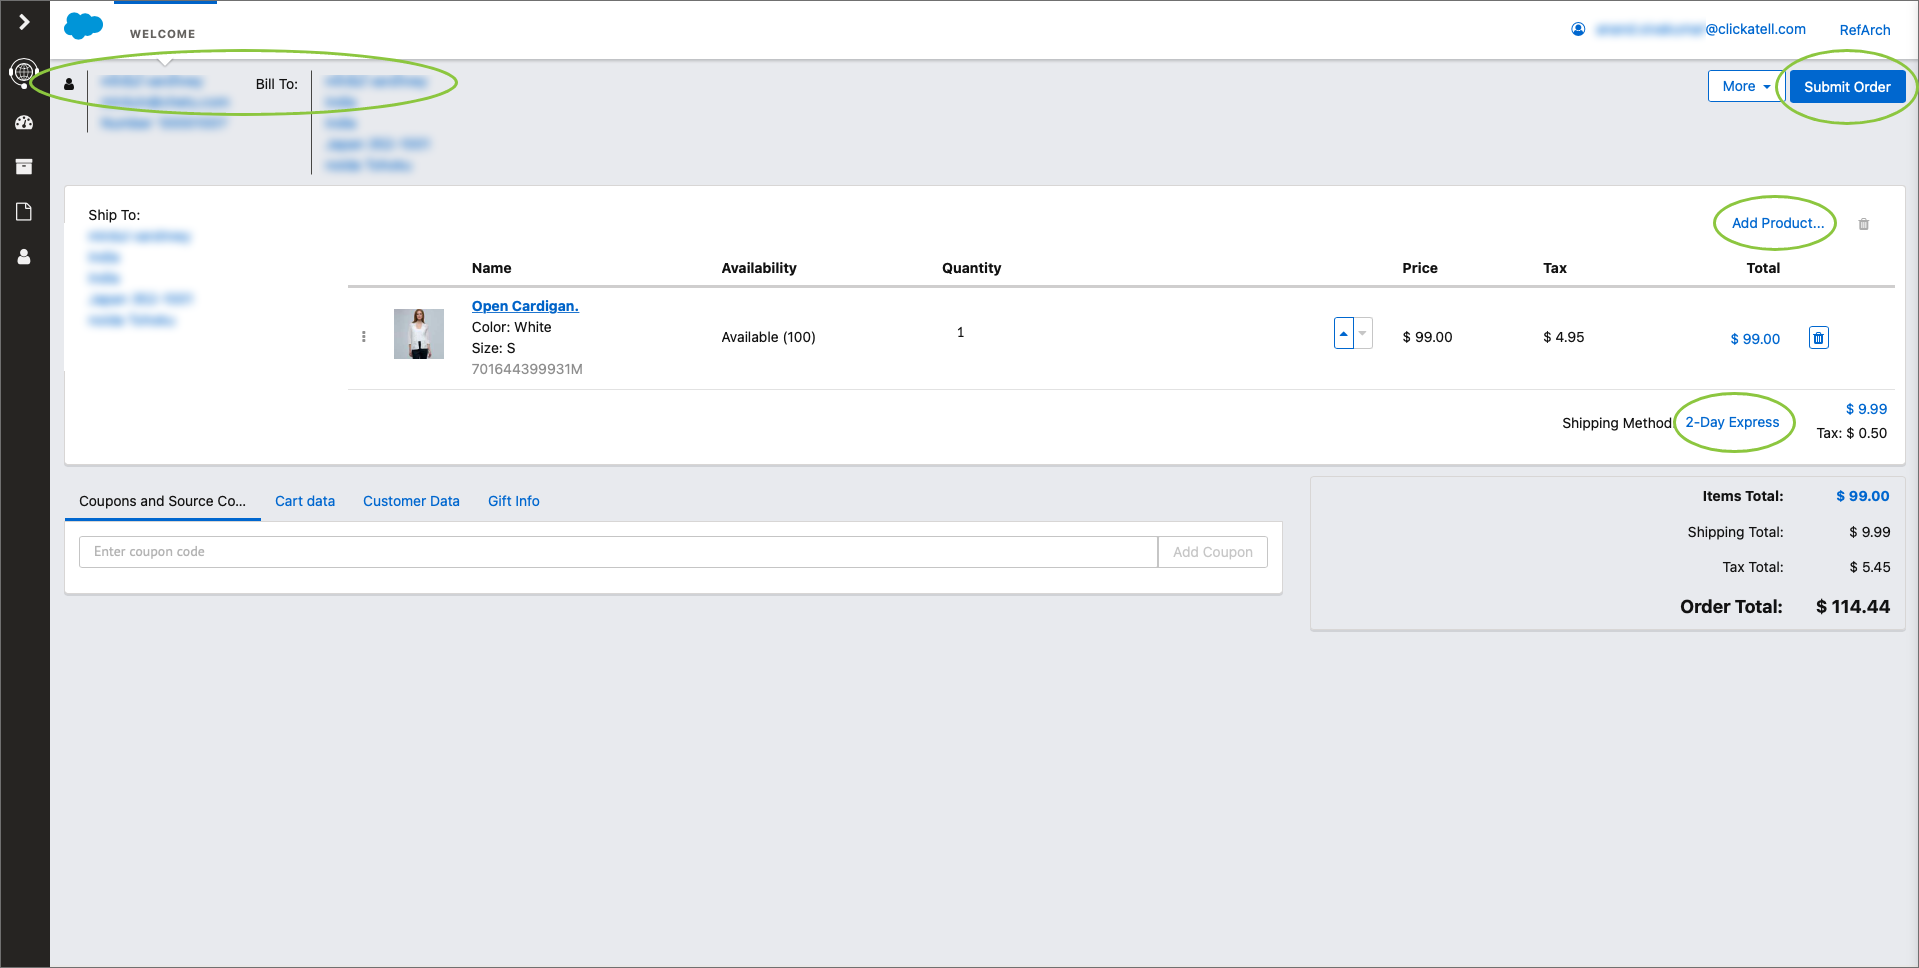
2. The existing order management workflows are used to capture the order:
Select a customer.
Set the billing address.
Click Add Product and select the products the customer wants to buy.
Select a shipping method.
Confirm order details and click Submit order.
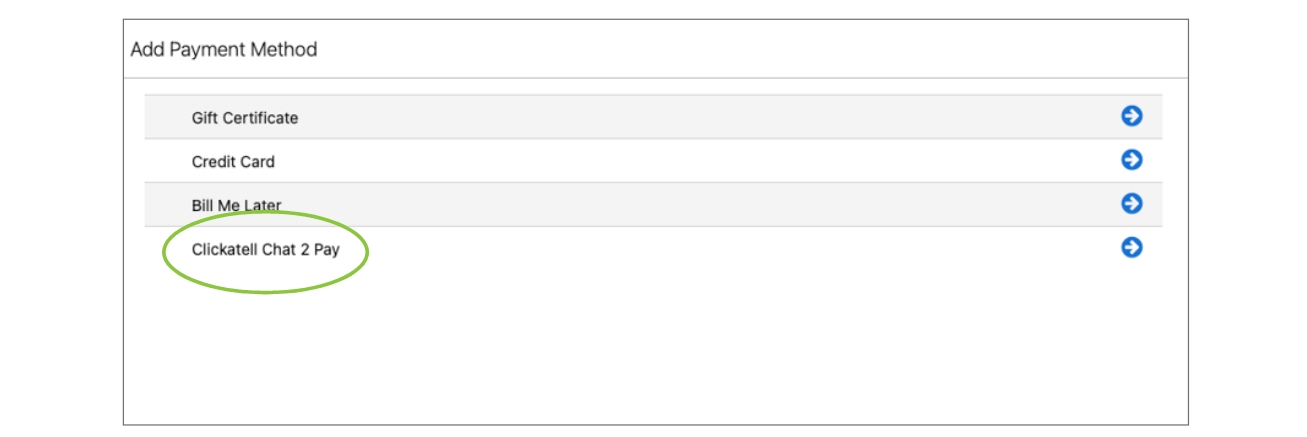
3. Chat 2 Pay appears as a new payment method. Select this, confirm order details, and click Save.
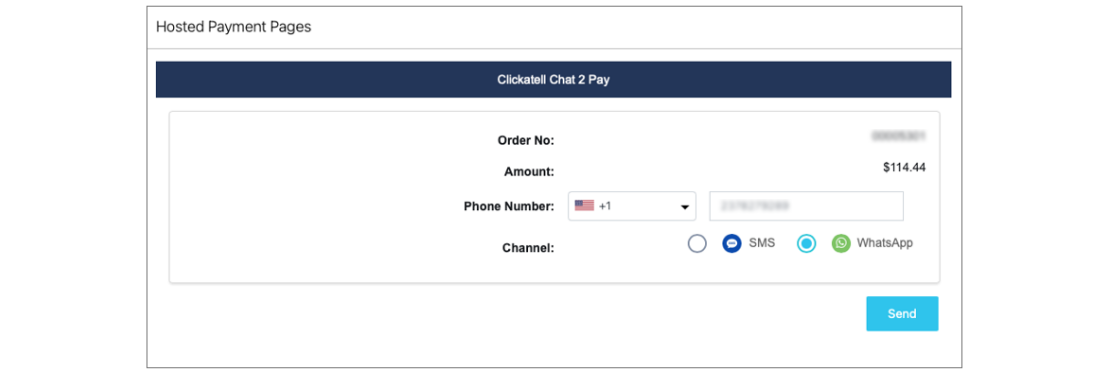
The order information is auto-populated.
If the customer's phone number is available in Salesforce, this will also auto-populate and can be edited by the customer service agent.
Select the channel you will use to send the link to the customer.
Click Send.