Clickatell Hosted Checkout (Recommended)
Recommended option for a frictionless, secure, in-channel checkout experience and customizable checkout page hosted by Clickatell.
The benefits of using Clickatell Hosted Checkout:
Once the initial checkout journey is complete, customers can make fast, secure subsequent payments without leaving the channel.
Customers can store their card details through tokenization. This allows for convenient and streamlined future payments with any merchant using Clickatell's hosted checkout.
The payment page is fully customizable, enabling you to update the look and feel as needed.
Configure Clickatell Hosted Checkout Payment Link
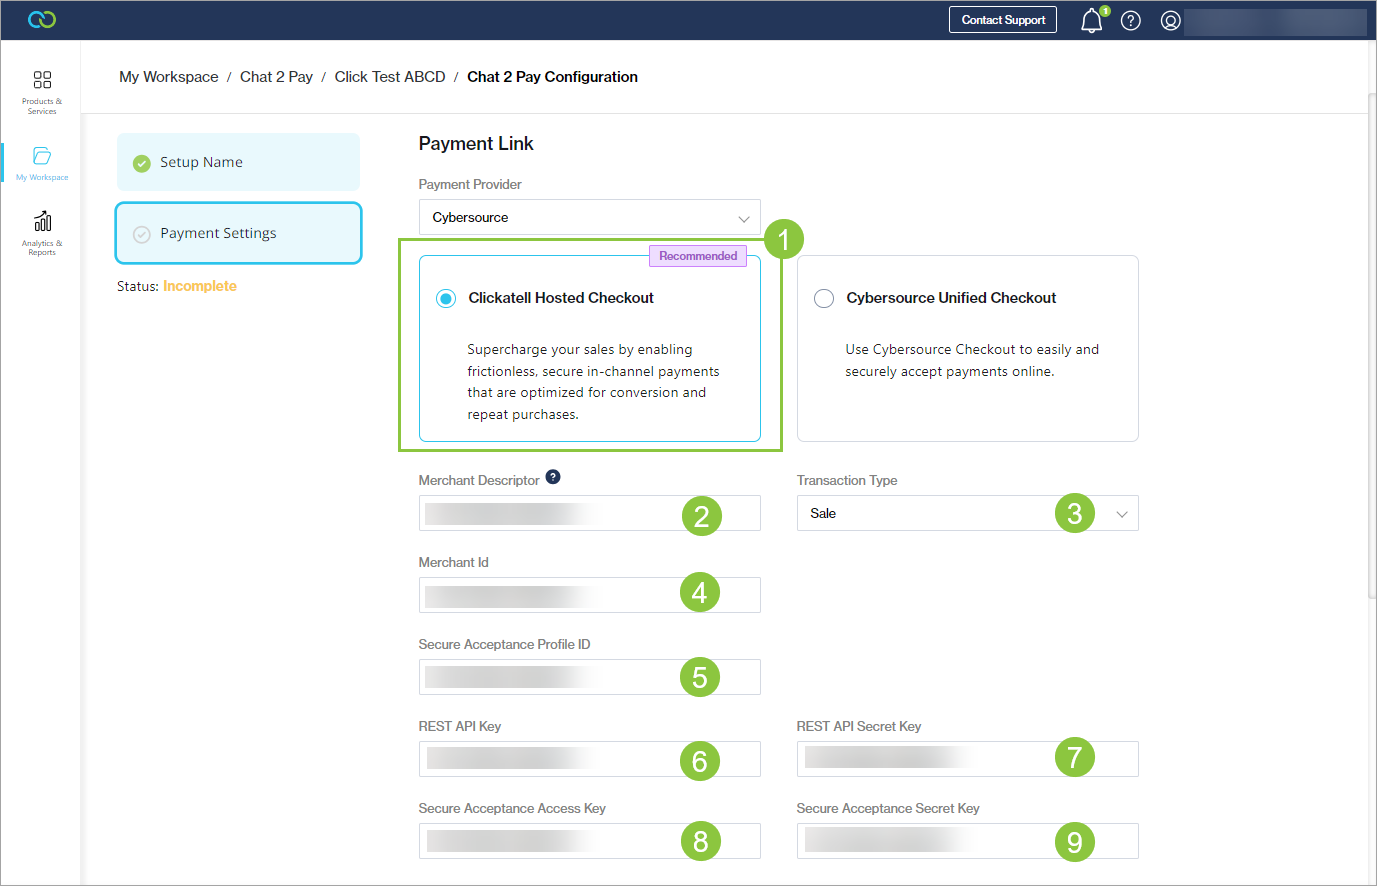
Select Clickatell Hosted Checkout.
Merchant Descriptor: This is the name that appears on both the merchant's and the customer's bank or credit card statements when the customer makes a purchase from the merchant.
Transaction Type:
Authorization: If all transactions using the Chat 2 Pay platform must only result in a credit/debit card authorization. This is used in scenarios where you would like to place a hold on the customer's card with the capture occurring at a later time.
Sale: If all transactions using the Chat 2 Pay platform must result in a credit/debit card authorization and payment acceptance being processed immediately after each other.
Merchant ID: The Merchant ID (MID) configured on your payment provider account that you use to accept payments using the Chat 2 Pay service.
Secure Acceptance Profile ID: The Profile ID configured to your selected MID as found in the payment provider portal.
REST API Key: This is configured to your selected MID, found in your payment provider portal.
REST API Secret Key: This is configured to your selected MID, found payment provider portal.
Secure Acceptance Access Key: The Access Key configured to your selected MID, found in payment provider portal.
Secure Acceptance Secret Key: The Secret Key configured to your selected MID, found in payment provider portal.
Configure Clickatell Hosted Checkout Payment Page
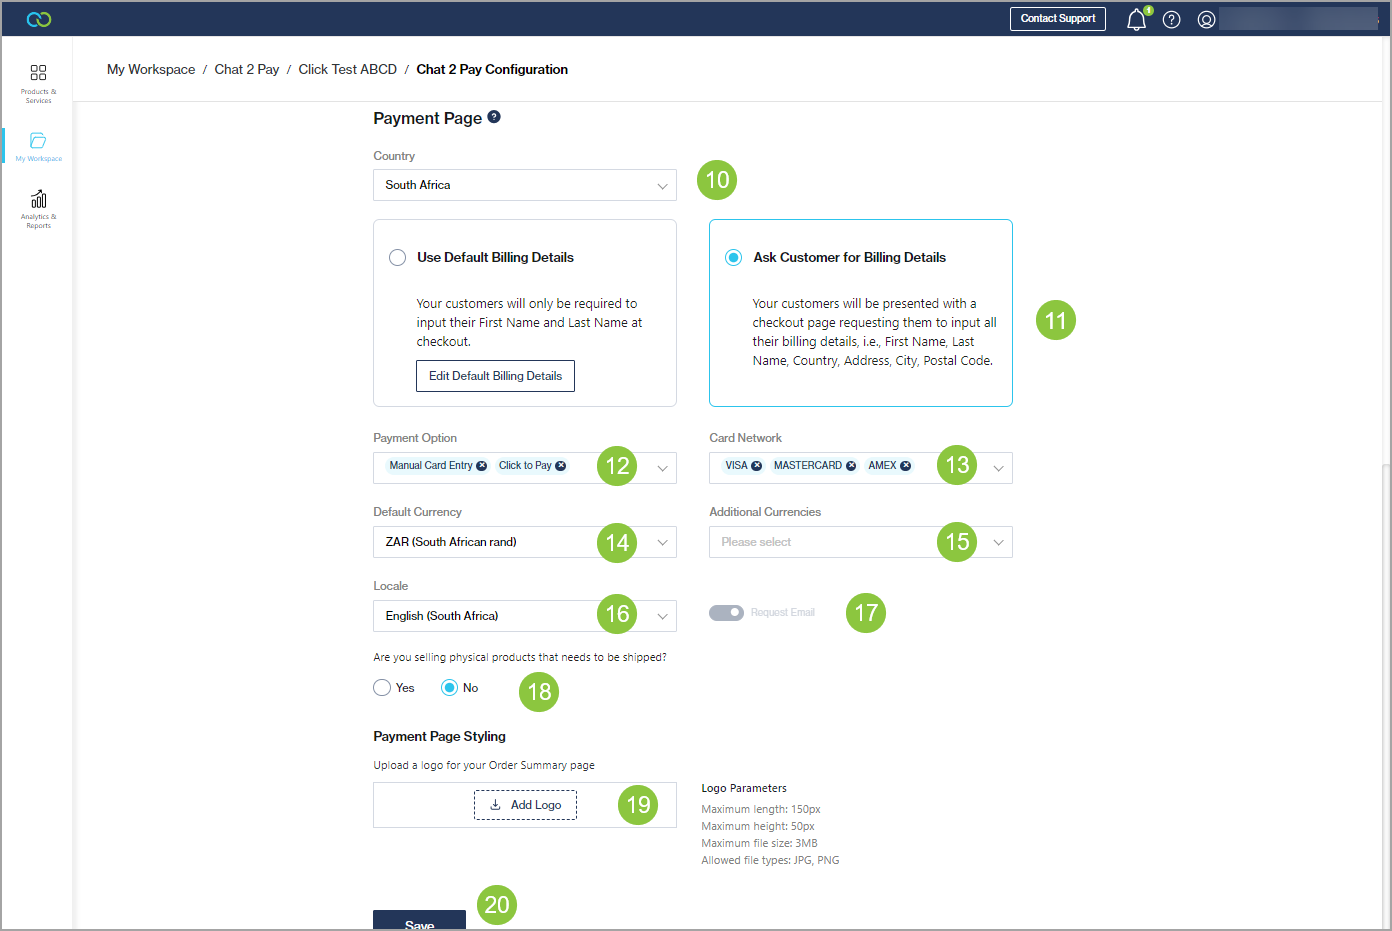
The Payment Page is where your customer adds a new credit/debit card or selects one from a wallet. You can configure what is presented to your customers as explained below.
Country: Select the countries where credit/debit card processing is allowed.
Billing Details: Select to use the default billing details or ask the customer to enter their billing details.
Payment Option:
Manual Card Entry: If you want to allow customers to add a new card.
Click to Pay: If you want to allow customers to save cards and retrieve cards from their wallets – Visa Click to Pay and MasterCard Click to Pay.
Card Network: Select the types of card networks you would like to enable.
Default Currency: Select the currencies that the payment page must support.
Additional Currencies: Select additional currencies that the payment page must support.
Locale: Select the language your payment page must appear in.
Request Email: Enable the payment page to ask for an email address.
Are you selling physical products that need to be shipped: Select Yes or No, depending on whether your products require shipping.
If you select Yes, also select which countries to ship to.
Payment Page Styling: Upload a logo to display to your customers on the Order Summary page.
Save your changes.
Last updated