Manage tickets
Assign tickets
Supervisors can ensure that all tickets are attended to in a timely fashion by assigning/reassigning tickets to agents.
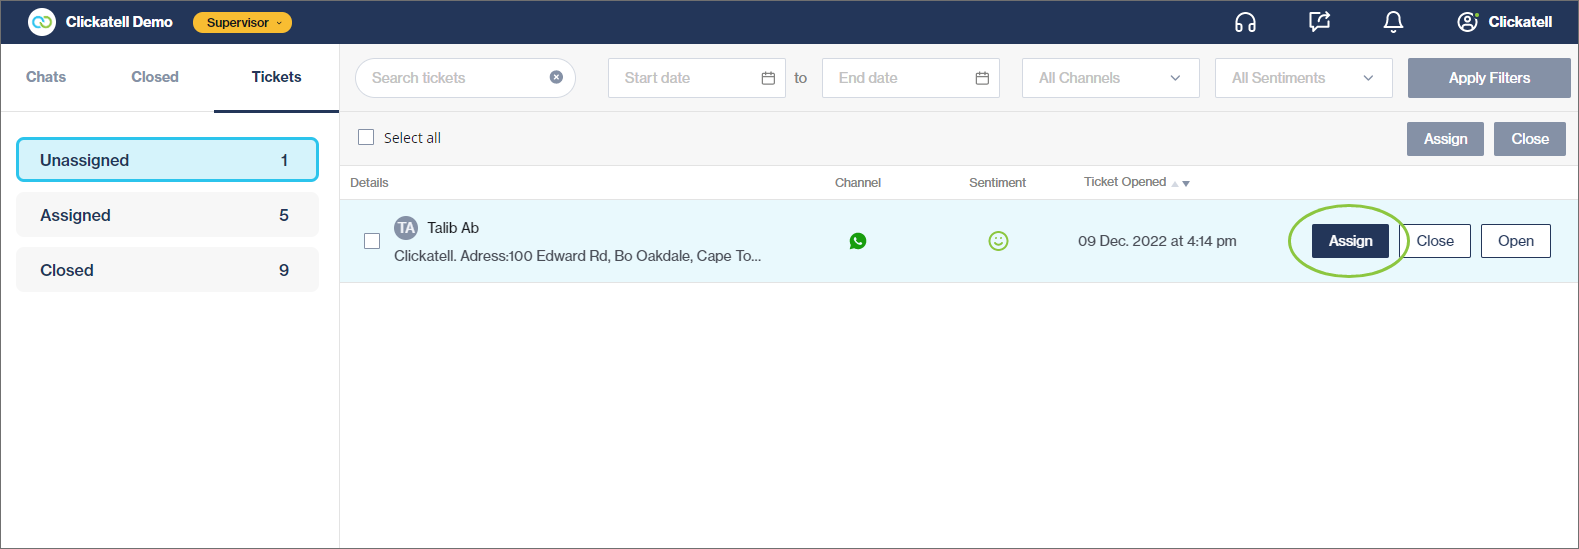
In the Unassigned tab, hover over the ticket you want to assign to a specific department or agent.
Click the Assign button.
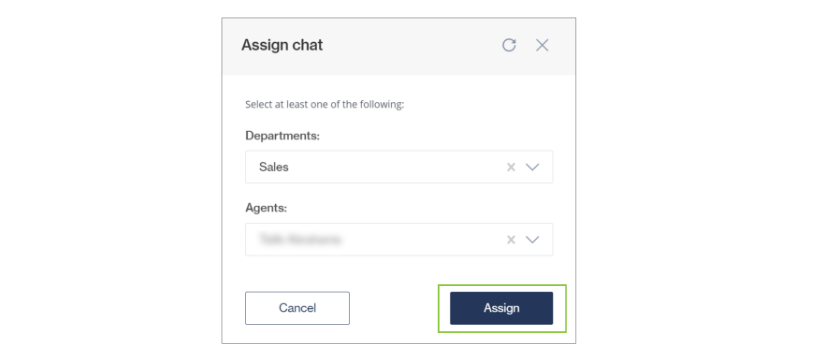
In the pop-up, select the specific department and/or agent that you want to assign the ticket to and click Assign.
The selected department may subsequently apply the routing logic within that department. If a specific agent is selected, the agent will receive the ticket in their roster view as a new chat. The ticket will be removed from the Supervisor's Tickets tab.
You cannot assign a chat to a department where no agents are available to receive the chat.
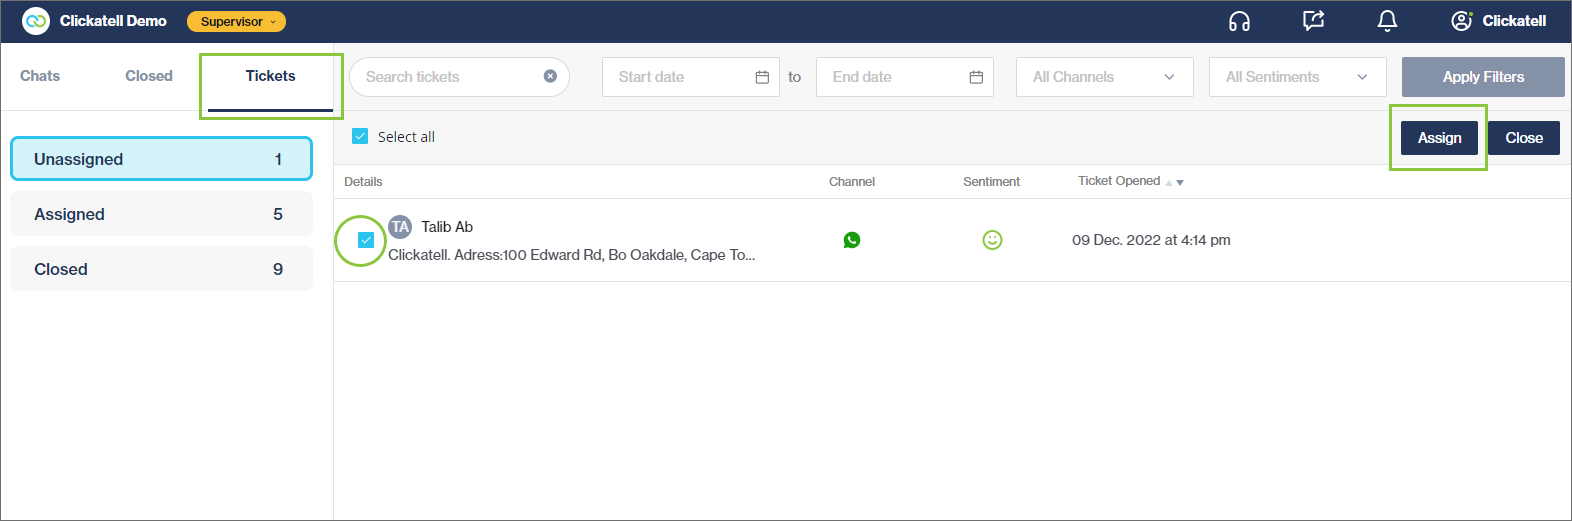
You can assign multiple tickets to the same agent by selecting the checkbox next to each and using the Assign button at the top right.
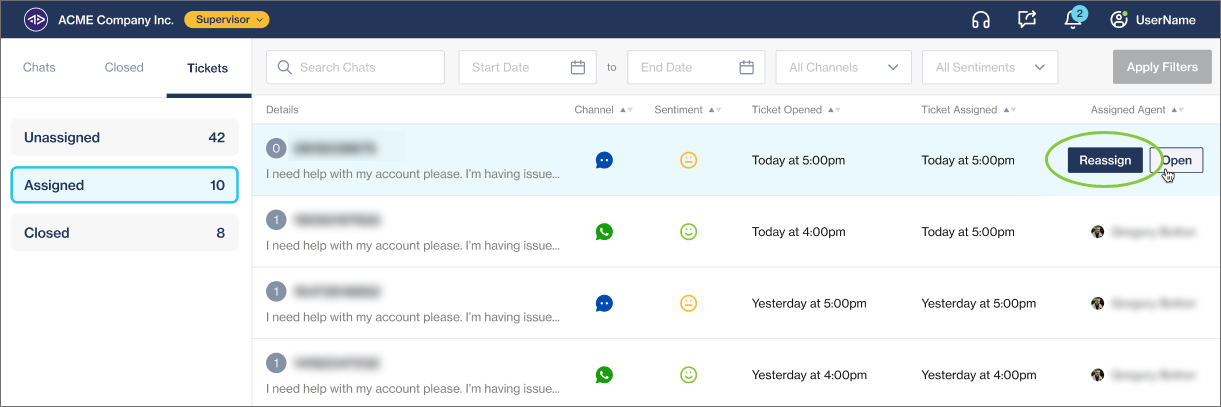
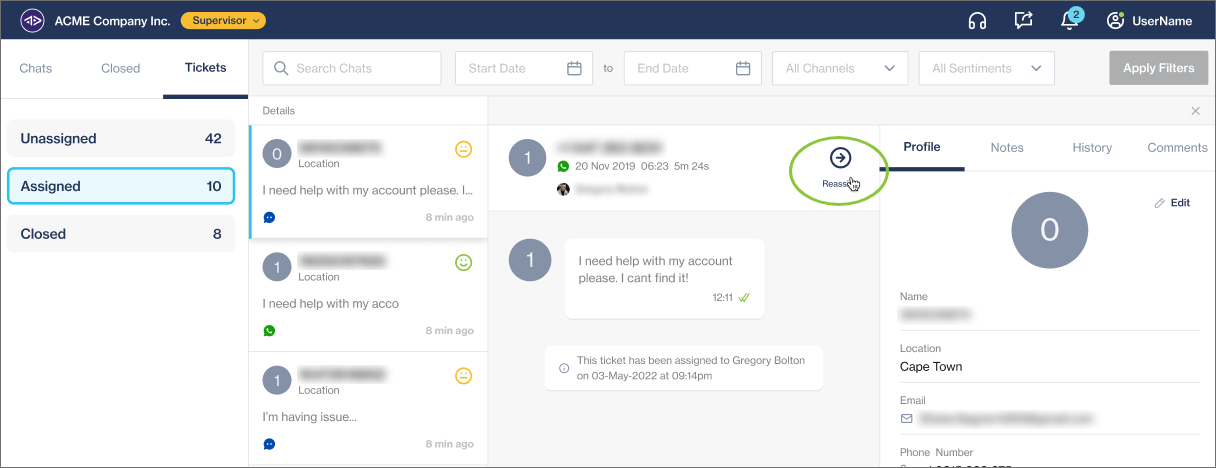
To reassign a ticket, go to the Assigned tab, hover over the ticket you want to reassign to another agent/department, and click the Reassign button.
Tickets can also be reassigned from within the chat view:
Close tickets
Supervisors can close an assigned or unassigned ticket. Closing a ticket moves it to the Closed status for both Supervisor and Agent and prevents anyone from responding to the ticket.
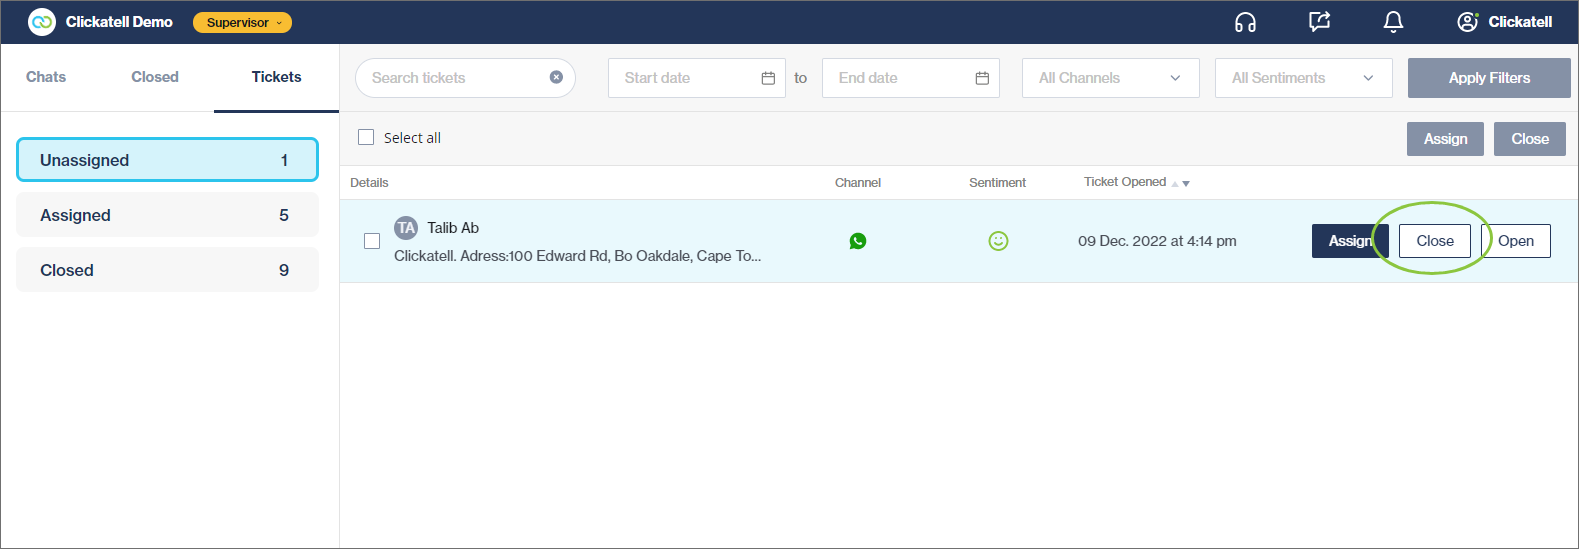
In the Tickets tab, hover over the ticket you want to close.
Click the Close button.
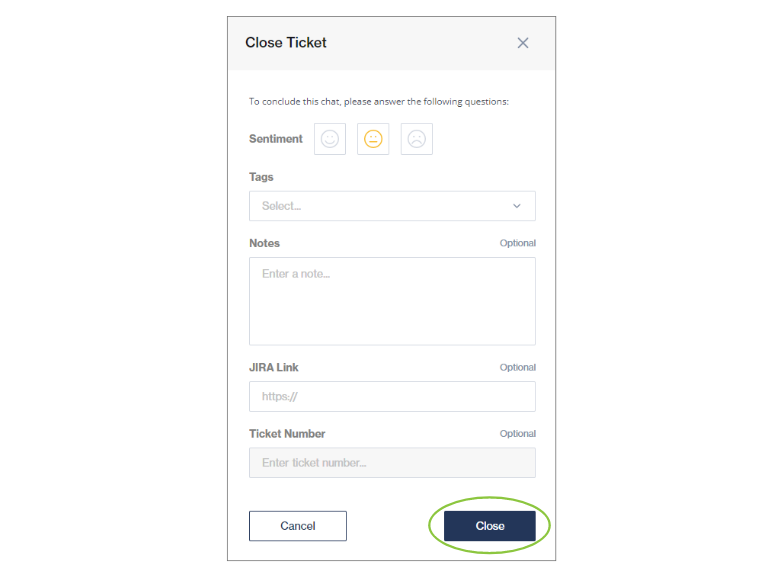
Complete the information on the pop-up and click Close.
You can close multiple tickets at once by selecting the checkbox next to each and using the Close button at the top right.
Last updated