Add and edit users
You can add as many users as you need to your Clickatell account. You can also edit the existing users in your account.
Adding a new user
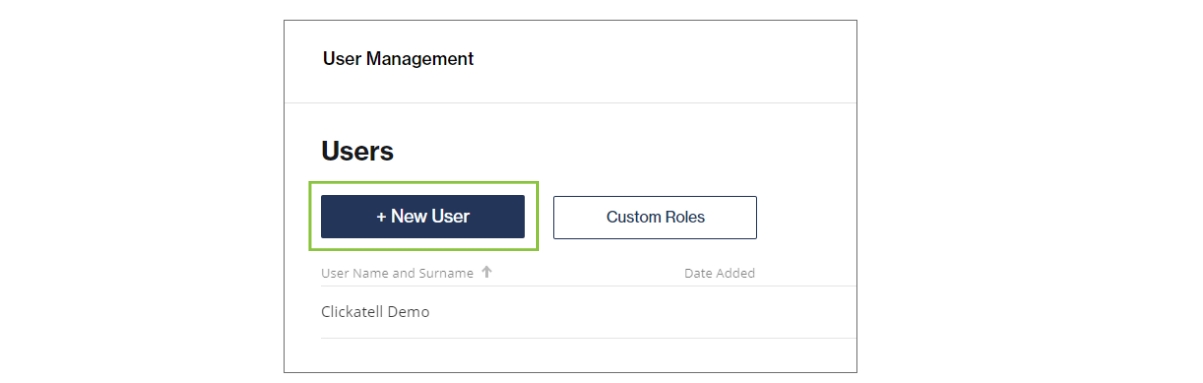
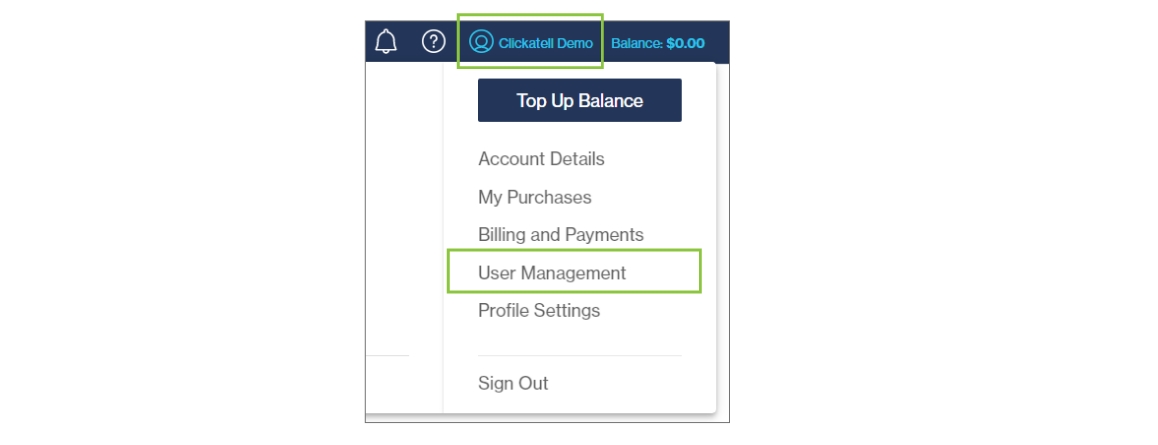
To add a new user, click on the profile icon in the top right of your screen and select 'User Management'.
Click on the '+ New User' button.
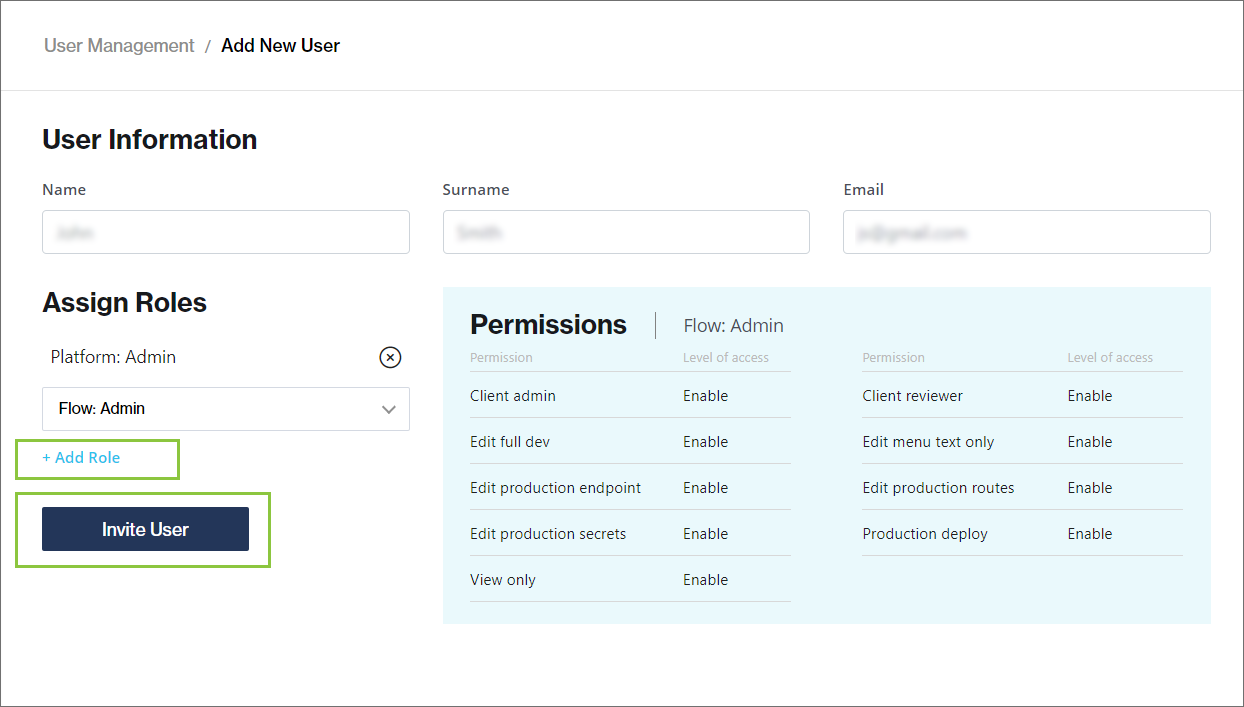
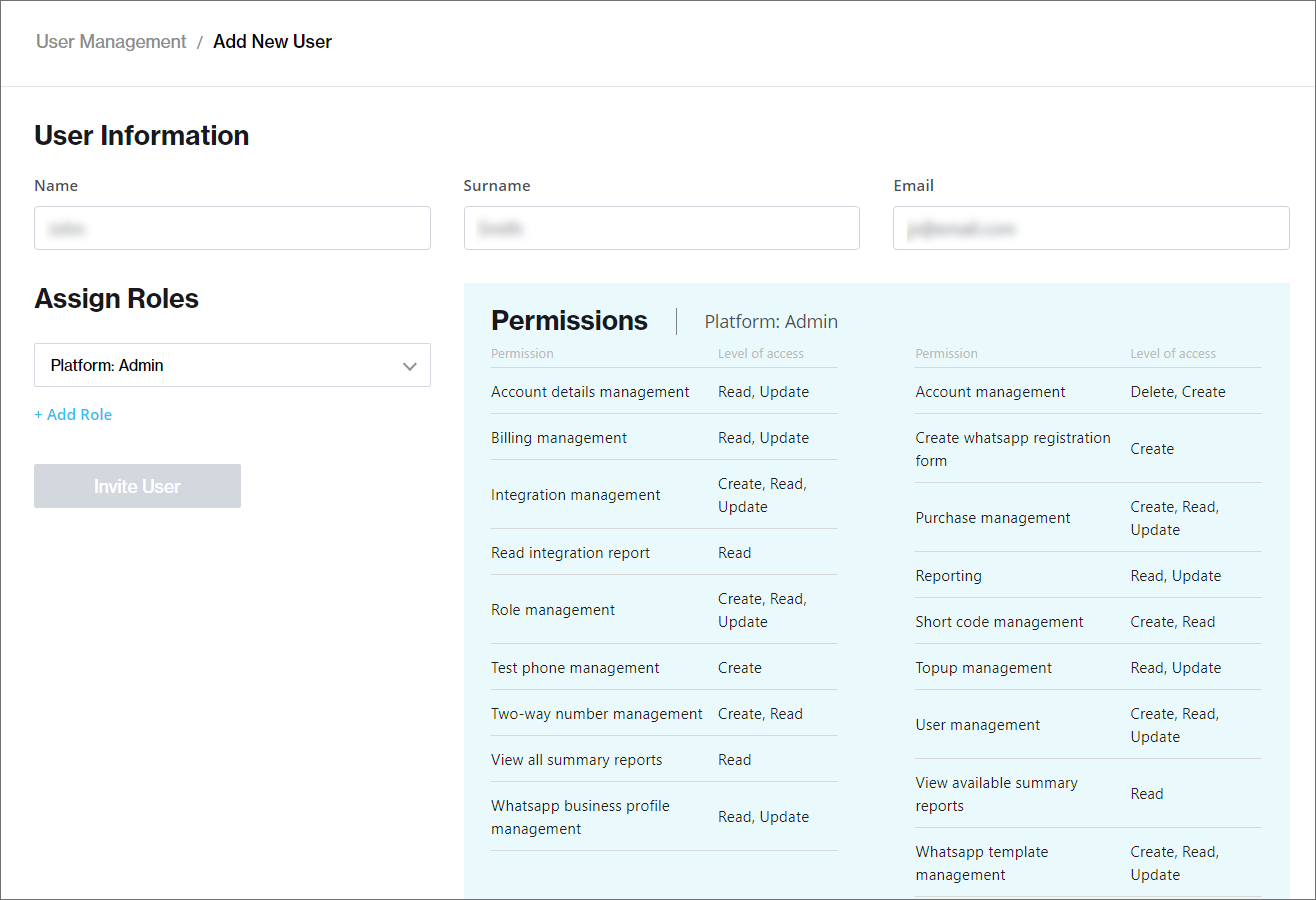
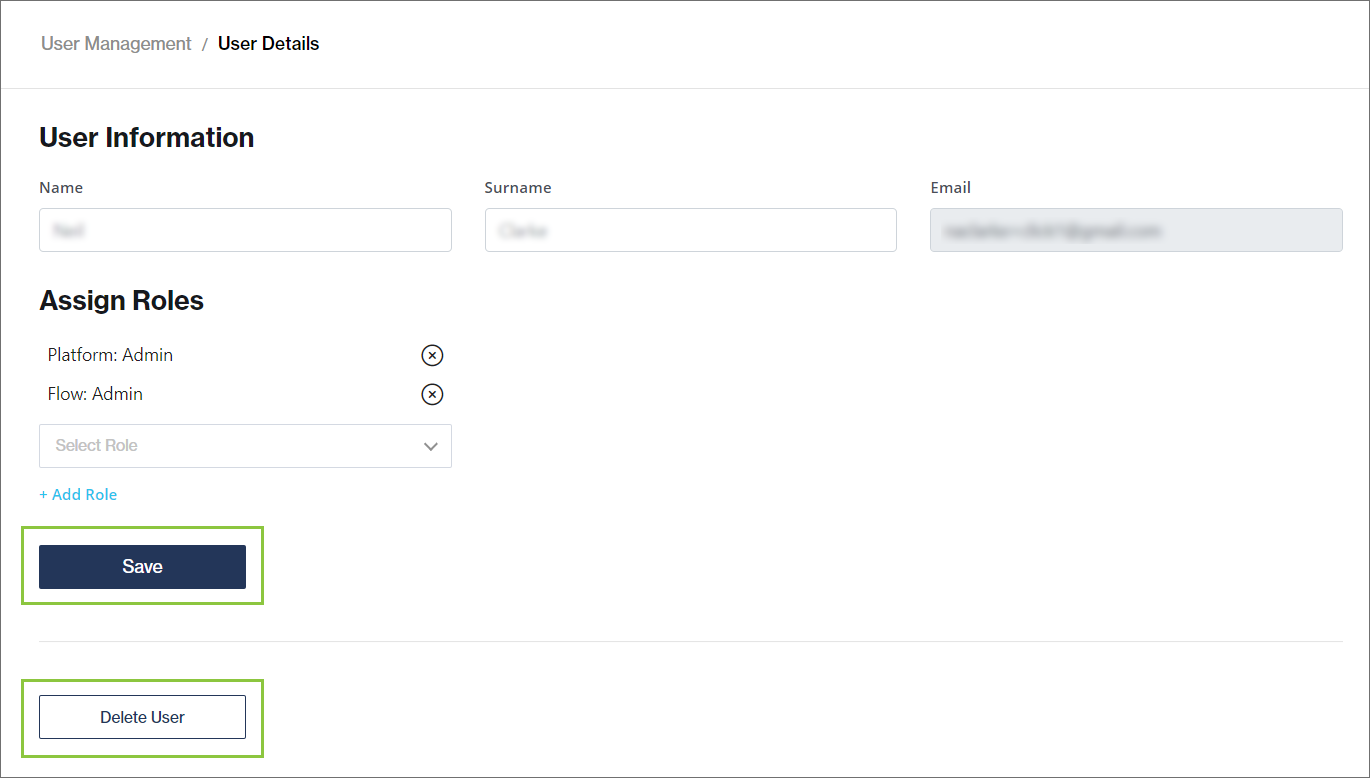
Add the user's personal details and assign one or more roles to the user. Selecting a role from the drop-down provides more information about the specific permissions and level of access associated with the role (as shown in the blue block below).
The options listed in the drop-down are determined by the products that have been activated on your account. Both predefined and custom roles (if any) are listed in the drop-down to select from. (See the next page of this user guide for information on how to add custom roles.)
Click the '+ Add Role' link to assign this role to the user. You can assign more than one role per user. To remove an assigned role, simply click the 'X' icon next to it.
Clicking the 'Invite User' button will send an email invitation to the user. The email contains a link directing the user to the sign-up page where they can set their password and gain access to the portal. What users can access on the portal is determined by the roles you've assigned to them and the permissions and level of access associated with it.
The password must contain at least:
One lowercase letter
One uppercase letter
One number
One special character
12 characters
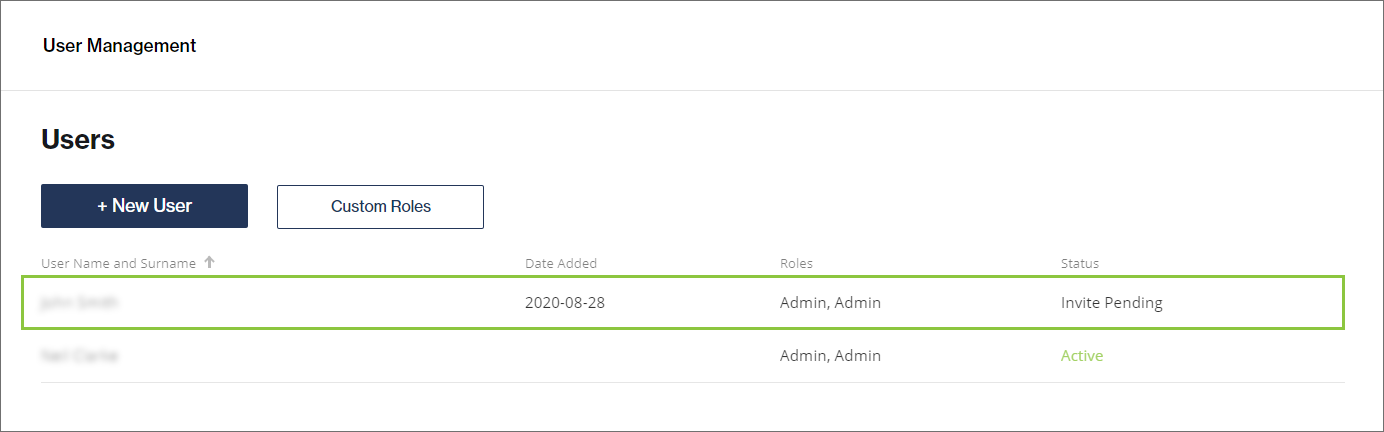
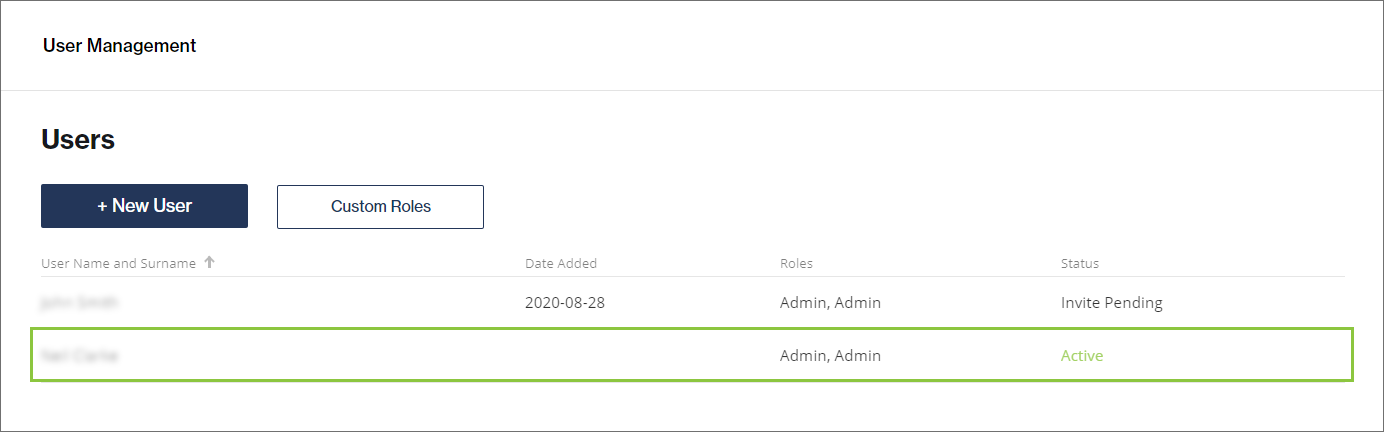
The new user is added to your Users table with the status 'Invite Pending". This will change to 'Active' once the user has accepted the invitation and logged into the portal.
Editing a user
To edit an existing user, click on the profile icon in the top right of your screen and select 'User Management'. From the table, select the user you want to edit.
After you've made your changes, click 'Save'. You can also delete the user from here.
Last updated