Embedded Client Authentication
To start using this service, you need to:
Add Embedded Client Authentication as a product in the Clickatell Portal.
Configure one or more Identity Providers in the Clickatell Portal (see below).
For Chat Flow:
Add Chat Flow as a product to your account.
Configure and add the OAuth Request node in your workflow(s).
For Chat Desk:
Add Chat Desk as a product to your account.
Use the Authentication extension to authenticate your end-users.
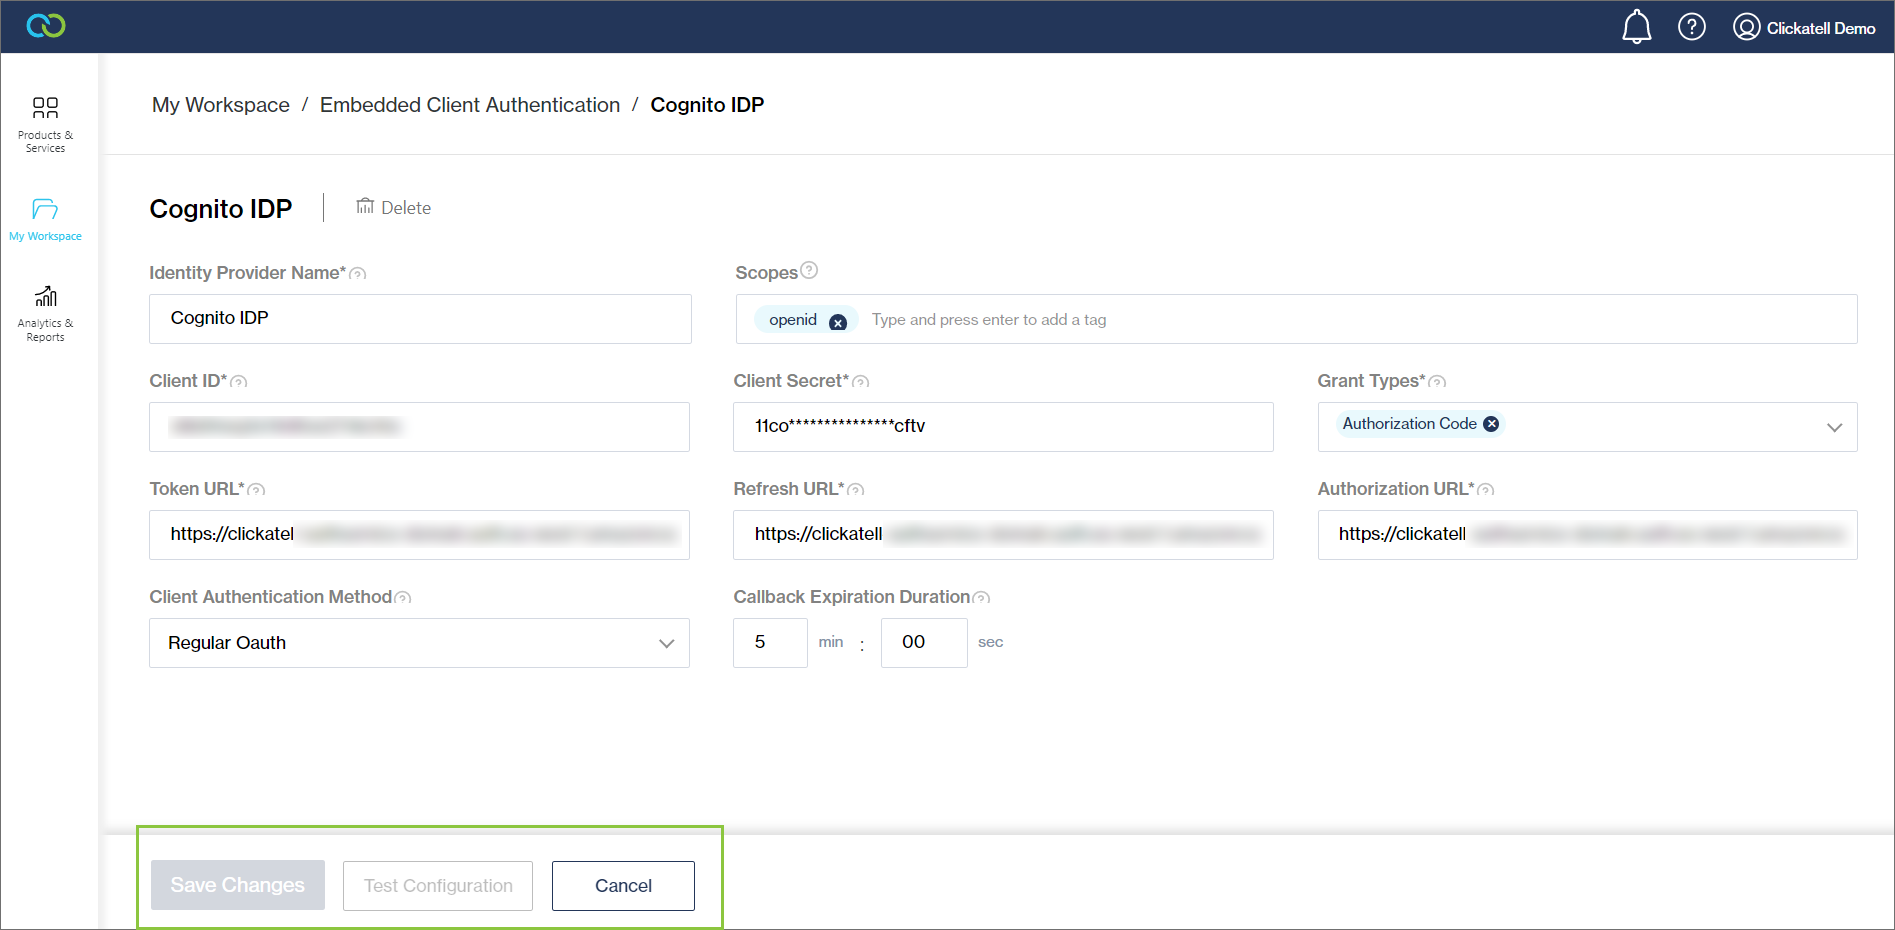
Configure/update an Identity Provider (IDP)
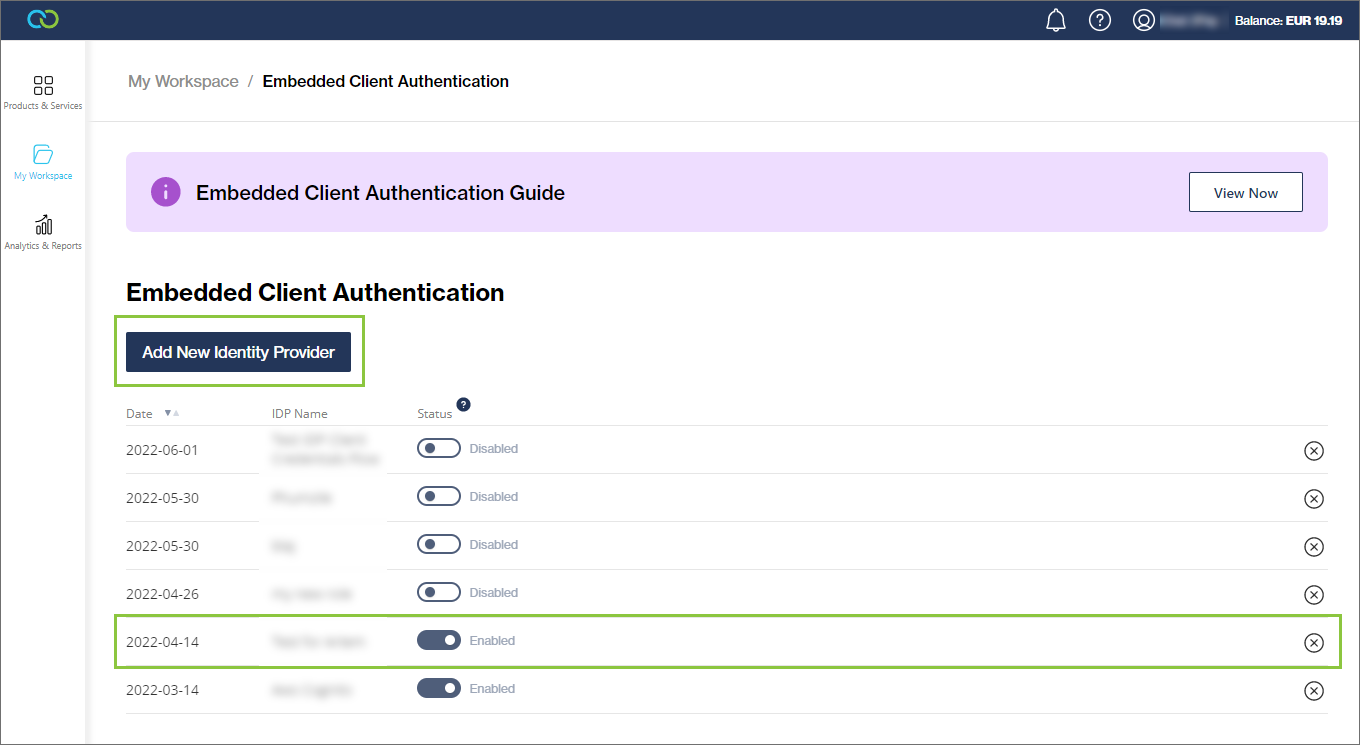
Navigate to My Workspace -> Embedded Client Authentication.
Click 'Add New Identity Provider' to configure a new IDP.
Select an existing IDP from the table to edit.
You can also disable/enable IDPs from here using the toggles, or delete them using the 'x' icon.
Configure your IDP following the prompts and the help info in the tooltips.
You can also test your configuration using the 'Test Configuration' button at the bottom.
Remember to save your changes.
All the IDPs you've set up in the Clickatell Portal will pull through to your Chat Flow or Chat Desk application.